Showing posts with label money saving. Show all posts

Thursday, July 5, 2018

{a day late}


"Knee high by the fourth of July"

Here in Michigan, this is how farmers gauge how well their corn is growing. 
We have two holidays for this vegetable crop ... plant around Memorial Day, and it should be knee-high by July 4th. Our first planting is that tall and better, compared to my [short] legs. Our second planting is behind by almost two weeks, which we were hoping for so we could space out the pickings for our roadside stand, and to give us a longer corn-on-the-cob eating season!


Friday, June 8, 2018

Our 2018 Garden


Memorial Day weekend is known in these parts as official garden planting time! Our last frost was technically a week and a half earlier than that, but we have been so busy that even if I could've planted earlier, Aaron wasn't able to till until that last weekend in May.

I had already put our spinach and lettuce in weeks earlier, and it has taken off! Our first spinach picking needs to be today, and I expect to start harvesting lettuce sometime next week. By start I mean, picking enough to bring inside for a salad. Adam and I have been happily munching on our frequent visits to check on the plants! He is a salad boy all the way, and helps himself to all the lettuce he can.


It was high time we got our tomatoes transplanted, as they outgrew our little greenhouse before any chance of frost was behind us. I stored them all on cookie sheets so I could easily bring them in for the night until it was warm enough to keep them outside uncovered. In the picture above, you can see how much taller the plants were than the shelves! Unfortunately, the shelving isn't adjustable. 

We feel like we nailed it on our tomato plants this year. It has been the most successful year yet! I started them March 20 in little Jiffy pellets, and transplanted them into 16 oz. plastic sour cream containers that I had saved. They took to the transplant so well, it confirmed that the potting soil wasn't our issue last year. I really liked having the plants in the containers. It worked well watering them from the bottom so they only soaked up as much as they needed. It was also fun to be able to watch to roots grow and see if that size container was big enough for 4 weeks of growing. When I transplanted them, the roots were definitely ready for some more space, but I don't feel like the plants were harmed any from crowding. 


I labeled some of my pots so I could keep track of varieties and other notes I though were worth keeping. This tomato plant was one that grew out of the bottom of a Jiffy pellet that I had pulled out and decided to transplant just to see what it would do. This photo was weeks later, and even now after 2 weeks in the garden dirt, you can't tell the difference between it and the rest of the tomato plants! 


This was another exciting success! I have tried every single year, for 4 years now, to plant flowers from seed. I finally got one to grow and BLOOM! Granted, it is just one, but it's one success. This marigold was a welcome sight! Unfortunately though, it did not survive the transplant into the garden, and I'm not even sure why. I guess we can always try again next year....


Adam has been my faithful helper and was excited to help carry plants from the greenhouse to the garden. He decided it was much more fun to carry them on top of his head. :)

He also enjoyed running the shovel digging the holes for the plants. We transplanted most of them in the evening when Aaron was home to help (and the one year old was in bed for the night), and I realized as I went to finish the next morning just how much longer it takes when I have a 17 month old to look over while also supervising the ambitious 2 year old single handedly. 

I was so confident I could do it by myself, but it was Daddy appreciation day. 
He does way more to help with our garden than I realized!


Due to not having enough stakes (and not wanting to buy more), we decided to try a stake-less method to caging tomatoes. We drove the cages into the ground a couple inches, and packed dirt around the bottom to hold them. Since we have an electric fence, we shouldn't have to worry about deer running into the cages, which was a problem we ran into last year when we thought for some reason it wasn't worth it to put the fence up. 


One week and a good rain or two after putting our garden in, the tomato plants were starting to bloom, and the corn was two inches tall. We had the perfect germinating weather! Our green beans, cucumbers, and okra didn't get in until at least a week later, and I have yet to see one of those popping out of the ground.  


This double corn plant is compliments of Adam, who thought he needed to plant his corn seeds right next to mine. 


Something we did different this year was take a little extra time for a better looking garden. We squared the edges, made it a little smaller for efficiency (we never planted the whole thing anyway), and made sure our rows were straight. Every year previously we thought we were planting straight rows only to realize the were at a terrible angle because of the odd shape of the garden. We have enjoyed looking at our garden this year already more than any other just because we took the time to do it right, which really wasn't much extra time, it just needed to be done. 

I'm looking forward to seeing what a difference these next couple weeks make, when we can see a garden full of neat, green rows!


Friday, May 4, 2018

Transplanting to Bigger Pots


Our tomato plants have taken off and are growing like crazy! It was high time we transplanted them into bigger pots before their roots were all intertwined in one big knot, so that's what my garden helper and I did over the weekend. 

Last year when I transplanted tomatoes, I used the little biodegradable cardboard cups. Those things can be pretty pricey, and we didn't have very good success with them, so I opted for a free pot option this year. 


We've been getting locally made butter in these little 16-oz. plastic containers. Instead of throwing them out, I saved them to use as transplant pots! Between these and some other random 16-oz. sour cream containers, I had more than enough for this years' crop. 

One of the biggest issues we had last year with the biodegradable pots were that we had a hard time controlling the moisture. The pots ended up soaking up all the water and rotting, leaving the soil inside either really wet or dry. Maybe I just didn't know how to take care of them, but one fail was enough for me to try something different.

In effort to get my watering and moisture levels better, I poked about 6 holes in the bottom of each of the containers with a nut pick. I made the holes more at the bend of the container rather than directly on the bottom so they wouldn't create a seal as they soaked up water. My idea was not just to drain excess water, but to be able to get watered from the bottom, so they could soak up just as much as they needed, and also to encourage the roots to grow deeper to find the water source. This should also eliminate any stem rot due to overwatering.


I started the seeds in these little Jiffy starter pellets (the best way to start seeds in my experience!) You can see the roots were ready for more soil! 


And this is what they looked like re-potted.


Here is what I used for transplant soil. I had told myself last year (after an unsuccessful growing season while using it) that I wouldn't be buying this stuff again, but I didn't know what else to get. Since I'd heard good things about it from other gardeners, I decided to give it another shot. And I went big and bought a cubic foot of it! It was much cheaper in bigger quantities and I figured between this year and next it'd get used. (Providing it actually did well for me this time!) 

So far I think it has been a major success. I am loving my new watering method! These plastic containers have worked so well! I'm beginning to wonder if it wasn't the cardboard pots that were my problem before, and not the soil.


My little buddy was a great help transplanting our seedlings. He has so enjoyed being a part of the gardening process! I was a little nervous letting him help with the fragile little plants at first, but we had extra and I wanted him to be able to help and learn, and he did really well! I could hand him the plants and leave him to do the rest on his own. He was so careful! 


Sadly, our peppers aren't doing so swell. They are only this tall after 5 weeks!!! Some of them just popped out of the soil a week ago. I'm kind of disappointed, since I need peppers but have never done well with them. I think I'll have to change my ways next year and either start them a month or two earlier or else put a heat lamp up. I'm tempted to go out and buy a couple plants from a greenhouse just to raise our chances of harvesting some. 


Saturday, April 14, 2018

Homemade Garlic Powder


I love trying new things. Especially when it involves eliminating waste or saving money!

A more recent experiment was attempting to make garlic powder. 


Last summer I bought a bunch of fresh garlic bulbs from the produce auction. We like to use garlic for all kinds of things, from making salsas, sauces, and garlic bread to get-well remedies and poultices. (It is our number one household healer for sickness!) Since it generally stores pretty well, I knew I wouldn't have to worry about trying to use up a half-peck of garlic right away. 


My goal with most of the fresh garlic was to mince it and keep it on hand in the refrigerator to use instead of garlic powder. I find the powdered form to be pretty pricey, and haven't seen it under $11/lb. Because fresh garlic is more potent, I don't have to use as much when I'm cooking. I adjusted my cooking habits to use fresh for everything except salad dressing and veggie dips. 

A few weeks ago, Aaron noticed a bunch of cloves were starting to dry out. I sorted what was left, minced the cloves that were still good and moist, and decided to make garlic powder with the rest. 


Here's how I did it. 

First, I took the skin off the garlic cloves and placed them on a sheet pan. For quicker dry time, I sliced/chopped the garlic into smaller pieces. 

I don't have a dehydrator, so I used my gas oven instead. Since it doesn't have a standing pilot light, I heated it up just enough to get it warm inside. Then I just let it set in there and I waited, checked on them, and waited some more. It took more time to completely dry out than I expected, but it was nice that I didn't have to keep an eye on it. I truly forgot about it a few times but it didn't matter because it wasn't going to spoil! I reheated the oven no more than 1-2x per day. Within a couple days, it was all dry to my satisfaction. I wanted to make sure they were dried out enough that it didn't get gummy when I went to blend it into a powder.

To blend it, I used my Magic Bullet. That thing is a workhorse! It has been used sooo much in the 6 or so years since I bought it. It's perfect for working with smaller quantities or heavy-duty use. Making salad dressing is probably the most mild thing I've ever use it for. Usually it's frozen fruit for smoothies, or other harder items like dried out garlic, which pretty much resembles rocks.


The Magic Bullet ground it up in a jiffy! We ended up with exactly 4 ounces of garlic powder. I wish I remembered how much I paid for the garlic so I could compare cost with store-bought powder. (I paid somewhere between 35-55 cents per giant bulb.) Whether making my own garlic powder is cost effective or not, these cloves were destined for the garbage, so "repurposing" them was a money-saving endeavor!


Monday, April 2, 2018

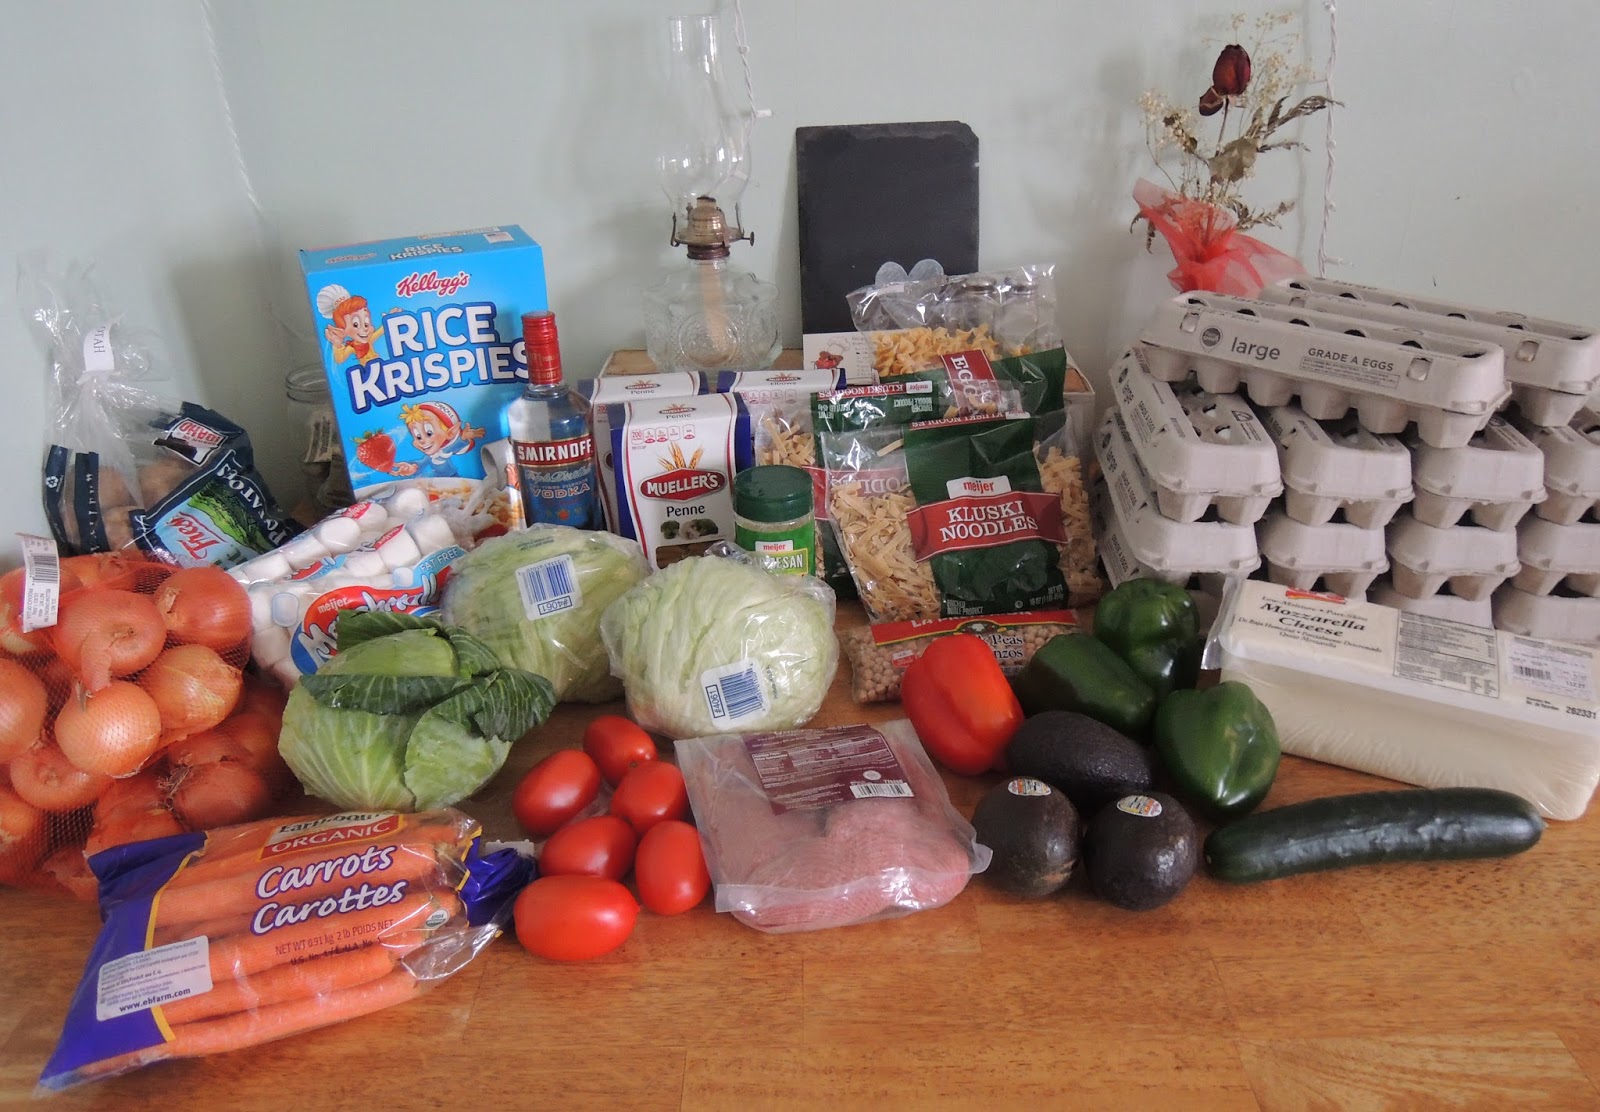
A Peek Inside My Grocery Budget

At the beginning of the year, we implemented something new...
A real-deal, honest-to-goodness grocery budget. 

We had talked about budgets numerous times, and have attempted trying to figure one more than once, but we literally didn't feel like it was right for us. We are savers and penny-pinchers as it is, and have been keeping track of where our money has gone ever since we got married. We've looked back and made mental notes and changed habits along the way. (Maybe that is a form of budget? I dunno.)

Being a money/numbers nerd, I decided I wanted the challenge of a budget to see if there were more ways I could cut my spending. Plus I like using cash, so this was a great way to make sure I had cash on hand. It has already eliminated my need to ask Aaron for his wallet! 

Looking back on last year's average monthly grocery bill, I figured $200 sounded reasonable. It was enough less than our 2017 average that I would have to be a little more conscious of where my money was going, but not a huge enough difference that it would feel stressful. I am feeding two adults and two toddlers, and serve a meal to 50 people once a month (I allot $50/mo. for the crowd meal). This budget does not include beef for our family, which we buy by the partial cow every couple years.

After giving it a try for a few months now, I am excited to report that I have successfully made it through the first quarter under budget!


January.
I did not do a full crowd meal (only dessert), but did make several meals for large families with new babies. 

My larger bulk purchases consisted of a 2.5 liter container of olive oil and a couple pounds of onion powder. The oil will last me until September. Total cost of bulk items was $46.15.

At the end of the month, I had $4.13 left.


February.
I made a full crowd meal and dessert, but already had about 1/3 of my ingredients covered, since I made turkey noodle soup using a turkey I had in my freezer.

Bulk purchases included vanilla beans and vodka so I could make my own vanilla. While it was a small investment up front, it will save me a LOT of money, since I only use real vanilla. To buy another quart of what I had been using previously would've cost me a whopping $80. I also bought a 50 lb. bag of wheat berries so I can continue grinding my own flour for bread and such. Total cost between the vanilla making supplies and wheat berries was roughly $46.

At the end of the month, I had $2.29 left. 


March.
I made another full crowd meal and dessert, and my cost into that was around $39.00. I have had a blog post typed up for a couple weeks now, but never got around finishing one last money figure so I could post it for you! 

As far as bulk purchases, I had bought a 10 lb. block of cheddar for this month's crowd meal, and ended up with 7 lbs. left for personal use. My goal was to chop it up and freeze most of it so it would last us awhile, but something happened ... and it got eaten before it made it into the freezer. Instead of mourning the loss of 7 lbs. of cheese, I was glad for the extra treat and the delight I saw on my husband's face every time he grabbed the block for a quick snack or sandwich. He loves cheese, and it made me happy to see him happy. Not to mention the kids excitement over a slice for them, too! And my baby learned to say the word "cheese" over all this. Cost into her education... I mean, the 7 lbs. cheddar, was $20.23.

I had quite a bit left over when I reached the end of the month, which allowed me to buy several pounds of butter at $2/lb. I happened upon the sale (and needed more butter anyway), so it was nice to have the money in my wallet so I could take advantage of it! Stocking up on butter cost me $12. 

Rather excited about the numbers this time! We had $23.62 left at the end of the month!

~

Interesting fact: I made a meal plan for January and February, but did not put one together in March. I'm curious if this had anything to do with how much we had left over at the end of the month? I find if I don't have a new selection of groceries I'm forced to get creative with what I do have. 

Other random interesting fact: We had beans with rice no more than once per month, and each time they included more expensive ingredients to dress them up ... like meat, cheese, and sour cream. By the way, I think I've created the most delicious form of beans and rice. Problem is, I hardly measure things so I'm not really sure how to share the recipe with you. 


Thursday, January 4, 2018

Cooking for a Crowd: Episode 13 - Christmas Chex

My Crowd Dessert day just so happened to be the same weekend as their Christmas Party, so we went right along with the festive occasion and served a fancy holiday dish.

Christmas Chex!

I've been working on using up odd ingredients that I have in my pantry, so this is where the idea sprang from. One random item sitting on my shelf was a big block of white vanilla bark. Generally people use this in place of white chocolate chips, for coating candies and such. It was given to me once upon a time, and I figured I'd use it by making truffles or something fun like that. Problem is, truffles are not the cheapest treat out there (hence why you only get three puny ones for a giant price tag at a restaurant), so I decided it was not a good choice for a crowd dessert. Knowing how easy it is to pop three in your mouth... and feeding 40 people... I'd have to make over 100 just to be sure everybody got some. That sounded like a lot of work, and a lot of money, so instead I googled "what to do with vanilla bark". I found all sorts of unhealthy recipes! I needed one that would yield enough dessert to serve everyone with the 24oz. brick I had, so the Christmas Chex mix that seemed to flood Pinterest looked like the recipe that would make the most out of the vanilla coating.


The recipe I used came straight from the Chex cereal website. (You can find it here: https://www.chex.com/recipes/christmas-chex-party-mix/) I adapted it a bit to fit my needs and preferences, like omitting the mini marshmallows (ew!), and skipping out on the sprinkles, since I didn't have any and it wasn't worth my time or money to get some just for the sake of fancy garnishing.

So my version of this recipe used 4 basic components. 

PSA!!! Please note: I did not say ingredients. There are way more than 4 ingredients in this dessert. Things like Cereal, Pillsbury dough, Cool Whip, and Condensed Soup are not ingredients, but food items made up of multiple ingredients. It is my pet peeve when people call processed foods like these ingredients. All too many times I come across recipes advertised as "Easy 4 Ingredient Casserole" or similar, when in reality it is four pre-made, pre-packaged, unhealthy items that you just open, dump, mix together, and bake. Such recipes are falsely named unless it literally is four ingredients such as potatoes, butter, salt, and milk. In which case you can just call it mashed potatoes. Thank you. 


Where was I? Oh yes, the four basic components: chex cereal, pretzels, vanilla bark, and M&Ms. It also has a small amount of powdered sugar for coating. I had to go out and buy the cereal, pretzels, and M&Ms, since I didn't have any on hand (and don't generally). Unfortunately I wasn't able to find chex-like cereal at the store I was hoping to (where cereal is almost reasonably priced), so I had to go elsewhere and pay the price tag. I was able to get the store-brand, which saved me quite a bit over the brand name Chex, though still more than I was anticipating. The box of cereal cost me $3.29, the pretzels were $1, and the M&Ms were on sale for $2.49/bag (I only used half the bag). So my cost (minus the small amount of powdered sugar, which I have no way of calculating) for this dessert is $5.53. 

Total cost: $5.53 divided by 40 = $0.14/serving.

The amount was perfect for the size group I was feeding! There weren't any leftovers because people kept munching while socializing after the meal, but it did take awhile for the bowl full to disappear completely. A note for next time, or for you if you happen to try the recipe, is to add the M&Ms while the candy coating is still soft. The recipe asks you to put the M&Ms on after the mixture has hardened, when you break it up and prepare to serve, but I found that they just wanted to fall through the cracks and hang out on the bottom of the bowl. Had I known this, I'd have skipped the M&Ms entirely, except I still wanted the color pop they offered. So remember: add candies when the vanilla bark is still soft (preferably sprinkle them on right after you've spread your mixture on the sheet pans to dry). This way hopefully they will be able to stick some to the pretzels and cereal.


Sunday, December 17, 2017

Cooking for a Crowd - Episode 12: Chili

I'm here to report on our December crowd meal! For once I have zero stories of crazy busyness keeping me from forgetting our meal day. I actually had time to prepare, spend time in the kitchen, run to the grocery store for some last minute fresh items. It was a good weekend.

Like I always do, I asked for my husband's suggestion on what to make. His immediate response was chili! I had just made it earlier that week, so I was like "Again? I just made it!". So I listed a few other ideas and he still wanted chili, and requested leftovers, so guess what I made?

Chili! 

For some reason I felt like it hadn't been long since I made it for the crowd meal, but looking back in my blog posts I discovered it was last December, so a year ago. (You can find that post here.) I was curious to see if I could make it cheaper than last time with only a day to plan. We'll see how I did! 


One of the perks of chili is that it's a very simple, but tasty dish. I can my own tomatoes, so it's not only quick, but also free. Beans are cheap, it doesn't require a huge amount of meat, and how hard is it to whip up a batch of cornbread?! I think this was the first time I've duplicated a meal that I've already blogged, so I was able to look back on last year's post for reference. That was super handy, and very convenient to figure how much of what ingredients I needed. I had originally thought I would need 4 lbs. of ground beef, but after looking back at my notes, realized I had used 6 lbs. last time, so we could've ended up with more of a tomato-bean soup otherwise. Ask [almost] anyone - they like a meaty chili. Still trying to keep within a budget, I strive for the happy medium. 

Here's the rundown on the pot of soup:
I used 10 quarts of chunky tomatoes (free), 2 pounds of dry kidney beans ($2.58), 6 lbs. beef ($12.38), and spices (probably about $1 worth). I put it in my 16-quart stockpot, and it almost filled it, so I'd say we were at around 14 quarts (3 1/2 gallons) of soup. I served sour cream with it (something I'd have forgotten had I not blogged about it previously), and while I spent $5.96 on 4 16oz. containers of sour cream, we only actually used two of them. So counting only the sour cream used, this part of the meal totals in at $18.94, which is a whole $3.02 less than last year! We had 5 quarts left over, which made both Aaron and me very satisfied. He got his leftovers to take to work, I had a few easy lunches for the kids and me, all giving me a few less meals to cook for! I ended up putting half of it in the freezer, so we'll have an easy pre-made supper in the next few weeks, too. 

I made three batches of cornbread, and it filled a 10x15" and a 7x11" oblong baking dish. Combined, the two pans total 6.5 quarts, so I figure it would be about the same as if I had used two 9x13 baking dishes. We were able to get free milk this past week in exchange for taking care of a family member's place while they were on vacation, so that cut cornbread expenses greatly since I needed over 5 cups for the recipe. Part of my goal for this month was to make something that used a substantial amount of milk simply because we had zero cost in a refrigerator full. (Not that I didn't have a dozen other ways to use up milk! We went through 6 gallons easily in a week.) All the rest of the ingredients into the cornbread (cornmeal, flour, eggs, butter, etc.) cost me $3.29. That figure includes the butter and maple syrup used for serving. The maple syrup was free that someone gifted us. I used that rather than stuff we had bought because the gifted syrup was in a glass container and I was curious to know how much would get consumed (it ended up being 1/2 cup). Next time, I would make one more batch of cornbread, because we only ended up with one piece left after the meal was over. We wouldn't have minded bringing more home to go with our leftover chili.


To add some veggies to the meal, I made a salad as well. It seems like I always make salad and I am stuck in a rut of doing it the same way. Well, I switched it up a little bit this time by adding boiled eggs instead of tomatoes, but for next time I might switch up my salad game even further and try something new. We'll see. Anyhow, this month's salad consisted of 2 heads of iceberg lettuce (1.87), 1 cucumber (.88), 1 orange pepper (.41), 6 hard-boiled eggs (.72), and half a bag of croutons (.89). Salad dressing I estimate around $1.00. This makes the salad total in at $5.79. There were enough leftovers to feed 3 servings.

Now let's add up all three parts and see how we compare with last time! $18.94+$3.29+$5.79= $28.02. Wow! I made it under $30! That's only $1.06 more than last December, but I added a salad to the meal this time, and we ended up with more leftovers, so we definitely got a bigger bang for our buck. Dividing our total by the 40 mouths fed, and we come out at 70 cents per serving. (For reference, while we served 40, only half of them were adults.) This month has made the top 3 list for least expense per serving!


Saturday, November 11, 2017

Cooking for a Crowd - Episode 11: Tomato Soup

Tomato Soup. Of course.

Actually I didn't originally plan to serve it this soon after making it, but I knew we were going to have a very crazy weekend which in turn would leave me not wanting to spend much time cooking.

I was right. Friday we were up super early and spent the day at my brother-in-law's place making applesauce. (Read about last year's applesauce day here.) It is always a huge production, and this year was certainly no exception. We broke the record and made over 1100 quarts in 8 hours. Some of that applesauce was saved aside for Sunday, when we were planning to turn it into apple butter. So Sunday was another early morning and long day. We were able to get 120 quarts of apple butter! If you've been reading the previous Crowd Cooking posts, you'll remember that Sunday is the day I serve these meals. So on apple butter Sunday, I was in charge of feeding everyone, on top of my husband and I being in charge of the whole apple butter event. But you know, we tend to attract crazy, and the whole lack of sleep and desire to cook didn't matter. I had tomato soup.


Two good things about the fact that we have a basement full of soup is this: it's cheap, and all you have to do is heat and serve. To go along with the meal, we made the classic grilled cheese sandwich, and a salad for the side. Here's the rundown on what we used, along with the expenses.

Tomato Soup -  I opened 12 quart jars, and we ended up with 2 quarts left over. Cost per quart was 50 cents x 12 = $6.00.

Grilled Cheese - The bread came from Aunt Millie's Bakery Thrift Store, where I got two giant (1.75 lb!) loaves of Italian bread for $0.89 each. I also got two regular sized loaves of wheat bread at $0.50/each. Total cost on bread was $2.78. The cheese was a large block of mozzarella that I got at our food service store for $2.19/lb. They can slice it on the spot, so I had them do that for me. The block of cheese was just over 6 pounds, and cost 13.40. I estimate I got around 80 slices out of it. We used about 3.5 pounds and had 2.5 pounds leftover. The butter was some I had in the freezer that I purchased this summer at $2.50/lb. We used 1.5 pounds of it, so the total butter cost was $3.75.
With bread, butter, and cheese, our total cost into the sandwiches equals $19.93, but if I subtract the leftover cheese ($5.40 worth), our sandwich expense is at $14.53. I had brought a loaf of homemade bread in case we needed more, but we ended up with enough of the bought bread leftover that we could've made a few more sandwiches.

Salad - 2 heads of lettuce @.97 each = $1.94, 1 cucumber @.50, 1 orange pepper @ 1.67, 1 bag croutons @$1.79, and several tomatoes that I had a free coupon for. For the salad dressing I had two jars of my homemade french and ranch, and also had 2 partially used store bought bottles of Italian and Thousand Island. We went through less than $1 worth of dressing total, but I'll call it a dollar for our figures. We ended up using only 1.5 heads of lettuce, and had a couple servings of salad leftover. Cost into the whole salad was $6.90.

Cost between all three parts total up to $27.43. This is an incredible number for the amount of people we were feeding (40). Our cost per person is at a low 68 cents! This is the lowest cost crowd meal since last December (which was .67 per serving)! I am rather pleased that the cost was this far under a dollar a serving. It helps make up for some of my higher months this summer.


Note: You can read more about the home-canned tomato soup here.


Thursday, November 9, 2017

Canning Tomato Soup

Ah yes, I have more to tell about my last produce auction buy. Remember the acorn squash? Those were a great deal! The other buy I haven't mentioned, is the tomatoes. Lots of tomatoes!

Where I live, our first frost is generally the second-to-last week in September. This has been SO different, in that we just got our first frost the last week in October! This extended our growing season a substantial amount. I just brought in the last of my spinach a few days ago, and that completed our garden. So at the October 13 produce auction, there were plenty of tomatoes. Since most people don't expect to find them this late in the year, their canning had been done months before, in the peak of tomato season. So with there not being a market for them anymore, they were going really cheap.

Our tomatoes did terrible this year. The deer ate off most of the plants, too much rain killed another one, and there just weren't many blossoms left after all that. We were able to get enough to keep us eating fresh, but our canning tomatoes came from elsewhere. A friend of mine let me come clean out her tomato patch after she was finished with her canning, and I ended up getting several bushels! From that, I was able to cross a few items off my "we need to can this year" list. I was even able to can a pot of tomato soup - something we had been wanting to do since we were married, but weren't able to get ahold of the recipe until now. Yeah, we could've found someone else's recipe, but this tomato soup is different, and so much better than any either Aaron or I have ever tried. We figured we could go through at least a quart a week easy, so the batch I made from the friend's tomatoes wasn't quite as much as we figured we could go through in a year.

Produce auction to the rescue!

I mean, since they have been going for a mere $1 a box at the end of the season, I could easily get a few boxes and finish off what we needed. Get double that, and we wouldn't have to can any next year! Since we're all over not having to can everything every year, this sounded like a great plan. So I bid and I bought. The problem is, I didn't know how many quarts I could get per bushel. It never even occurred to me until after I brought them home. That might've been a good thing to know ahead of time. I mean, the two of us have canned several bushels of tomatoes in one day before, so I didn't think much of it. But then we started counting.... and figured I had just brought home about 11 bushels of tomatoes.


It still didn't faze me. I was excited, I hadn't spent a whole lot of money, and we were going to get our tomato soup that we wanted! After I brought Aaron out to see my purchase sitting there in the bed of the truck, we came inside and he asked when I was going to can it. Of course I said "Today!" I've always known tomatoes to be a more fragile fruit, so it's best not to let them sit and rot. They are so much easier to work with fresh. So I was going to start canning that afternoon. My amazing, supportive, go-with-the-flow husband jumped right in and assumed he was going to help me with it. I wasn't going to ask for his help, but all of a sudden he was working along side of me. His next question was asking where I planned to do it all. And of course, I said my kitchen. I mean, where else do I go to cook? But him being smarter than me said "Look, my brother has a huge commercial kitchen with a 10-burner stove. We could go over there and whip this stuff out in no time!" We have a tiny kitchen. I only have two stock pots, can only use one of them on my stove at a time, but have a two burner outdoor propane stove that we could use. Still, with our limited countertop space, this would be a huge task, so my visionary husband hardly needed to twist my arm before we were loading up jars, ingredients, canning equipment, and the kids to head on over to the canning kitchen.


Besides all the stove burners, stock pots, and stainless-steel countertops, another perk was that we could hose everything down when we were done! It hardly made a mess, but still, its nice that we didn't have to worry about tomato getting onto everything. 

The soup was pretty easy to make. We took the whole tomatoes (skin and all), and chopped them into a stock pot, and added a couple finely chopped onions to it. Let it cook down until soft and run the mixture through the Squeezo (or Victorio) strainer. The strainer is what separates the good stuff from the pulp. To make things go faster (and to save our arms), Aaron hooked his drill up to the strainer. He managed the tomato washing, soup straining, and canning. We both chopped the tomatoes and stirred the simmering pots, and I prepared the onions, mixed up the rest of the ingredients, and washed the dishes. A couple of nieces and nephews came out to watch, which led to them begging to try running the Victorio! The few minutes of extra help freed up some time for Aaron to get the canners going.


This is by far the biggest cooking pot I've ever seen! It holds about 15 gallons. It's so big, my 6-foot husband could hide behind it! 


Because we didn't get started until mid-afternoon, we could only get about half of the tomatoes finished. The rest of them looked to be in good enough condition that they would hold a few more days pretty well, so we went back two days later (Aaron's next off day), to finish them. All in all, we ended up with 191 quarts! This was um, more than anticipated. I was hoping for like 100. Looking on the bright side, we won't have to can tomato soup again until after the year 2022. Another good thing was the fact that I already had that many jars washed and ready in the basement, so that cut down on some time in the canning prep. The first summer we were married we went out and bought dozens upon dozens of jars in all sizes for an amazing price, and we still have a couple hundred of those jars sitting in the basement unused. 


Also, while the tomatoes were cheap, there was other cost into the rest of the ingredients, like onions, spices, salt, etc. Calculating all our expenses and dividing it 191 ways, we figure we made it all at 50 cents per quart. That's not bad at all for a can of soup. If you went out and bought a small can of Campbell's soup (which isn't even comparable in flavor) at retail, you'd be spending more than that! With that being said, if you're in the market for some tomato soup, I might be able to work out a deal for you. Otherwise, don't be surprised if you happen to find some under your Christmas tree.


Monday, October 16, 2017

Deal of the Week

All summer there has been a produce auction going on just down the road from us. The auction is held twice a week, and I have been a frequent goer, to browse, bid, and enjoy a little bit of fresh air away from home to help keep me sane.

Being a former farmer's market salesperson, business manager, and hired hand, I heard plenty about food/produce auctions from other vendors, but didn't really know how they worked. It got my curiosity though, and with my love for food, this became something that I wanted to experience for myself. So when the auction opened up here in my town last summer, I was pretty excited! Being that I live in Amish country, it is owned and operated by a couple of amish families. There are lots of vendors from the community that bring all sorts of things to sell- from flowers to green beans to fresh homemade pies and butter. 


Now that I'm a housewife and am in charge of purchasing groceries, I have found it very helpful to keep on top of the going rate for fresh produce, and have enjoyed expanding my education in this department especially being a gardener myself. Dreaming of running a little roadside stand one day, I now have an inside peek at what people pay for wholesale produce, and can measure how much profit they might be making when they resell at their own stand. While I have no desire to resell other people's produce, I DO have an idea how much I could get for my own vegetables, should I have an abundance and decide to take it to auction to be sold. 

Our current gardening/canning plan is to pick a couple staple products to grow each year, but plant enough to last us for a few years. For example, next year we will need green beans. Instead of planting enough for us for a year, we plan to grow a large patch of beans, can enough to last three years, and then not have to worry about them for awhile. We planted three rows of beans the summer of 2015, and they will last us until spring 2018. If we plant four rows of beans, we'll be able to take at least a bushel to auction every week, earning us a minimum of $20 per week, for not much extra effort. (According to this year's going rate of $22-36 per bushel of green beans. Auction keeps 10% of earnings.)

Okay, I've gotten a little sidetracked here. While some prices raised my eyebrows at the auction, there have been other times I've found great deals on things I could use. Last week, well... if I was trying to watch my spending, I should've not taken the checkbook, and only limited myself to the amount of cash I had on hand like I normally do. But I did have it along with me, and I ended up needing to use it. Even though my grand total spending for the day was high, I stocked up on some great deals. 

Eggs. I bought 24 dozen eggs for $0.50-.75 less than I normally pay per dozen. Yes, 24 dozen is a lot of eggs for a family of two adults and two small children, but we can go through an easy 3 dozen a week. Because these are fresh eggs, they will last much longer than any you'll find on the grocery store shelf. I now have enough to last us into December, but I saved between $12.00 and $16.00 doing so. To me, this is a HUGE savings. 


Acorn Squash. This is my favorite. It has great sentimental qualities to me, as this is the squash variety I grew up on. My mom would cut them in half and bake with a pat of butter, chopped walnuts, a dash of cinnamon, and a splash of maple syrup, and it was the most delicious thing ever. Aaron however, grew up on Butternut squash, and that is the only variety he really cares for. Since I'm a general squash lover, I gladly grow his variety to feed us all through the winter. But at the auction I got a box of 40 acorn squash for $0.10 a piece! At that price, I decided it would be an excellent way to feed Adam and me lunch on the days Aaron works away from home. I can put the squash halves in the crock pot and have an easy meal for two for less than 50 cents, including the cost of the toppings! (I will omit the walnuts, to keep cost lower.) That's better than sandwiches, because the bread alone would cost the two of us about 40 cents per meal.


I spent a bit more on produce that day, but that will be another post for another day. It's a big story.

Thursday, August 31, 2017

Cooking for a Crowd: Episode 8 - Taco Salad

For this weeks crowd meal, I needed it to be two things:

1. Something that could transport well with minimal refrigeration.
2. Something I could easily prepare Sunday morning in someone else's kitchen.

So I chose one of the quickest, easiest crowd meals ever: taco salad. I have served this many times before the days of blogging my meals, because it's so simple! 

Growing up, taco salad was one of my favorite meals. So much yummy in the combination of lettuce, seasoned beef, tomatoes, cheese, tortilla chips, and the most delicious homemade taco salad dressing ever (or catalina if you prefer that name). To this day, that's our staple salad dressing, and my husband loves it just as much as I do. We always mixed the ingredients together and served it as a single dish.

When I got married, I was once served a build-your-own salad bar, which the host called taco salad. Sure, I had seen an in-home salad bar before, but calling it taco salad? What? But they did, and it was much different than the taco salad I knew. Comparing it to said salad, I'd say this version is more more like tacos without the shell. I'm still kind of partial to my precious childhood version, but this build-your-own style works well when you're trying to make an entire meal out of it to serve a bunch of people! 


When serving 40, there are a few pros and cons to doing it this way. 

Pros. 
- Picky people will love you. Not that I support or cater to picky eaters. I do not.
- Anyone with sensitivities to common foods like dairy or corn can still get the same meal as everyone else without any extra effort on your part. 
- You don't have to attempt mixing together giant bowls of pre-dressed salad (which often compresses a fair amount and doesn't go as far, so you'd have to make extra. This adds extra cost and work).

Cons.
- Some people will tend to load up on the meat and go easy on the veggies.
- There are a lot of individual bowls you have to set out with toppings. 
- You need a decent amount of counter/table space to serve the meal.


Every year my husband and I (and now our two kids), head over to the beaches of Lake Michigan for a day trip. This year we decided it would be fun to throw our little green army tent in the trunk and make it a weekend deal and spend Saturday night at a campground. Our plan was to leave from the campground Sunday morning in time to stop by a grocery store to get the ingredients I needed for the crowd meal, and then go straight to church from there. Well, we've been trying to liquidate some of the extra stuff we'd collected over the years from my husband's part-time resale business, and a guy was planning to come by Saturday evening to pick up a lawnmower we had listed for sale. So we scratched the camping idea last minute (I mean, the idea to camp was last minute, too...), and planned to come home in time to meet the guy that evening. We stopped by a grocery store on our way home Saturday, instead, so we would have everything ready to go Sunday morning. 

I had bought the ground beef, tortilla chips, and sour cream earlier in the week so I could control my prices a little better. Beef cost can vary by such a big margin, I wasn't going to chance being able to find it at some remote grocery store for any less than $4/lb. I tried getting the tomatoes locally too, but the selection was very slim and the tomatoes were hardly even ripe, so I saved that for last minute, too. 

Here are the toppings that went into the meal, along with what it cost me:

5 lbs. Ground Beef @1.79/lb - $12.21
5x 16 oz. Sour Cream @ 1.49 - $7.45
4 bags Tortilla Chips @1.69 - 6.76
Garden Lettuce - $0.00
2 heads Iceberg Lettuce - $3.48
Tomatoes @ 1.89/lb - ??
3 lbs. Shredded Cheese - $12.00 
2 pints homemade Salsa - $0.00
3 pints Pinto Beans - $0.60

Somehow I lost my receipt to the store we stopped at on our way home, so I don't have any idea how much I spent on the tomatoes. I got 3-4 large tomatoes, and maybe 6-8 romas? Also I'm guessing on the price of the lettuce and cheese, but am pretty positive I remember correctly.

Besides the prices being unpredictable due to not even knowing what town we were going to stop in for groceries, the meal choice was very convenient and even quicker to prepare than I anticipated. I was able to cook my meat the night before so it was one less thing to do Sunday morning. I also had been meaning to can dry beans all week both in preparation for this meal, and also because I've been wanting to can some for my pantry for a couple years now. It took me just as long to do up a canner full (18 pints) as it would've to cook just enough for this one meal. Because I had bought a 5-lb. bag of pinto beans last month, I already had the beans, and it was so much cheaper than trying to buy them pre-canned at the store. I calculated my cost at 20 cents per pint of home-canned beans! This is an incredible savings. Not that I ever buy canned beans, but in case you're someone that does and is looking for a new way to slash your grocery spending, you may want to consider switching to dry beans.

Leftovers:
In planning for the meal, I was preparing to feed quite a few extra mouths, but when the day came, I only ended up having to serve around 25 people (compared to the usual 40). I had plenty of lettuce in my garden, but didn't have time to pick a lot of extra and wash it that busy weekend, so I bought two heads at the store for backup in case I didn't have enough of our homegrown lettuce. Turned out we didn't need it, due to fewer people than expected. I mixed the ground beef and beans together this time so the beef would stretch some, and I thought I had plenty. Turns out my amounts were just right there. I had a few extra cans of pinto beans with me that I could've added to the meat to stretch it even further, had more people shown up. We also had 2-1/2 containers of sour cream, two bags of tortilla chips, maybe 1/3 or more (can't remember) of the tomatoes I had bought, and just over one pound of cheese left, as well. I feel confident that had we served the anticipated amount, we would've still have enough food for everyone. All in all, I spent much more than I "needed", since I was preparing for a crowd. The leftovers came in handy though, because the next day I needed a last minute, quick meal to take somewhere, and I already had all the ingredients ready to whip together a taco salad, so I am very grateful I had bought extra of everything!

I like to add up my total cost and also figure a per serving rate so I can have notes for reference in the future as I plan and prepare more crowd meals. It helps me knowing what I paid for certain ingredients so I can watch sales easier. It also helps create a challenge where next time I make a certain recipe for my crowd meal, I can try to cut cost even further. I know these numbers probably don't mean as much to you, especially since prices vary greatly depending on where you live. Be aware of that if you're using my reference numbers to compare with your own local stores, in case you live in an area where food prices might be a bit higher. My cost for all the ingredients this month (including the stuff "left over"), I estimate around $48.50. I sure wish I had that missing receipt to know for sure!!! This would put our per serving cost at $0.97. If I calculate the numbers using only the ingredients used divided by actual number of people served, we still would come out just over a dollar per person.

Ways I could've should've cut cost further:
Had I been blessed with more time, my plan was to go to the big town to do most of my shopping. I could've used a coupon I had for a free head of lettuce, plus bought a second one for only $1. That would've saved me $2.48 there. I also planned to stop at the restaurant supply store, since that is the best way for me to save money on cheese. There I can get a 5-lb. bag of cheddar for $12.99, which would've been a savings of $1.41 per pound (a total of $2.82 on the cheese). And tomatoes are usually only $.99/lb there, so that would've brought the price down a few dollars, since I ended up paying twice that at the out-of-town rural store. I figure I could've saved a good $8.00. I guess that was just an added cost to our deciding to take a quick vacation. :)


Monday, August 28, 2017

Salsa - Check!


The first canning of the season has happened. Finally. I mean, it is the end of August. 
But none of this stuff came from my garden! We still have our first tomato trying to turn orange, with all the others plain old, unripe green. My generous brother-in-law offered me these tomatoes from his garden, so I went over and picked a sack full this afternoon, which was just enough to make me a batch of salsa! At last, I have one of the tomato products crossed off my must-can-this-year list, and it is such a good feeling! My handy All American double-stack canner has helped me once again, and I now have 11 pints of salsa sitting on the counter top, the sound of sealing lids filling the air. 


Monday, July 24, 2017

Cooking for a Crowd: Episode 6 - Burrito Bowls

We're back with another edition of Crowd Cooking! This time we decided to go a little different route with our meal. With as warm as this summer has been, nobody wants to be slaving away in a hot kitchen, so I went for a meal that didn't require baking or extensive stove-top cooking during the heat of the day. The meal? Burrito Bowls!

One of the great features of this dish is ... lots of meat. Everybody loves meat! Another nice twist to this meal, is that it features some great popping flavors by using lime and cilantro. I find myself all too often sticking with plain old american tasting dishes, as much as I love the flare of other cuisine. I received some extra-positive compliments on the meal, and even my husband was wowed at how it all came together. He was also more than happy that we had leftovers to bring home.

While there are a lot of little parts to the meal (since it's a build-your-own style), it really was quite simple to make, especially considering the number of people I expected to serve.

Most of the prep was done the day of, since the veggies needed to stay as fresh as possible, but I was able to prepare a couple other things the day before:

The recipe I used as a guideline said to grill the chicken before chopping, but I don't have a grill, so I improvised. I marinated the chicken breasts for an hour in a delicious homemade concoction before cooking. Instead of using the recommended grill, I laid the chicken breasts out on a sheet pan and baked them. I fully intended to sear it in a cast-iron skillet beforehand, but I forgot about that detail until after I pulled the finished product out of the oven. I believe that would've been an unnecessary step, since the meat I pulled out from baking was nice and juicy, and nicely seasoned from the marinade. I let it cool enough to work with, and then chopped it into small cubes, which got dumped into an 8-quart crock-pot and placed in the fridge overnight.

The other thing I was able to prepare ahead was the beans. I always use dry beans rather than canned. It is very cost effective, and as long as you plan ahead a little, isn't much extra work. (I do not soak dry beans before cooking. I have read a number of conflicting articles on soaking or not soaking and have not found a difference in either method, either in cooking time or quality of product, so I opt for the simpler, quicker method.) Because it takes awhile to cook before beans are done, I used our outdoor propane stove. This helped keep the heat outside. When done, I put them in our 4-quart crock-pot and placed in the refrigerator. My original plan was to use the beans as filler to stretch the meat, but the chicken filled the crockpot all the way, so I decided to keep the beans separate. Besides, Aaron isn't fond of dry beans, so I knew he'd be happier with this choice.


In the morning, I turned the crockpot of chicken on high for 3-3.5 hours, and the beans on low. The beans were just right, and the chicken was just warm enough (I ended up having to stir it after 2 hours to help it heat through. I know you're not supposed to open a crockpot while cooking....). I also should've put some water on the bottom of the crockpot before adding the chicken, as it dried out quite a bit while heating up in the morning. Because it wasn't being served plain it wasn't a huge deal, but just a note for next time.

Day-of prep included chopping cilantro, lettuce, and tomatoes, and cooking the rice. For the rice, I juiced two limes and toasted the dry rice in the lime juice and some cooking oil. I then poured in the water and salt and cooked as normal. After cooking, I added the chopped cilantro and fluffed the rice with a fork. The flavor was pretty good on the rice, but I could've easily used one more lime. I'm not a huge lime person, but still thought it was a little weak in that area.  


As far as amounts and totals,
here are the final figures:

Rice- 12c. dry @$0.57/lb ...  3.07
Limes- x2 .........................      .98
Cilantro- 1 bunch .............    1.29

Chicken- 10lbs + breasts .. 17.24
Marinating ingredients ....       .30

Pinto Beans- 1lb. ............     1.75

Lettuce- 1 head ...............      .99

Tomatoes- 2.21 lbs. ........     2.17

Cheese- 1.5 lbs ...............     3.89

Sour Cream- 3, 24 oz. ....     8.07  

Spices and other misc ....       .30

Total: $40.05


I also had a jar of salsa and served 3 quarts of corn as a vegetable. Both of these were free from our garden.

Ways I could've cut cost further:
I went to the "big town" to do all my shopping, since they were having a sale on chicken and that alone cut my cost by dollars. I decided to buy the sour cream and lettuce there so I wouldn't have to go to yet another store (my local grocer) where they were on sale cheaper. It is an 18 mile drive from the "big town" store, and I didn't want to chance baby needing fed about the time I would've arrived back home at our local store. So, I paid $0.74 more for that convenience. I should've used lettuce from my garden, but I barely had enough (it has been a rough garden year!), and figured I'd save it for personal use.

I was on my way home from "big town" store when I realized I completely forgot the limes and cilantro even though it was on my list which I scanned numerous times before checking out. So I went back to our local store anyway. So much for paying for the convenience of getting the lettuce and sour cream at one store, because I could have just waited and gotten them cheaper had I known I needed to stop anyway. Thankfully baby was still content as ever as I shopped our local store for the two forgotten ingredients. We made it home and in the house before she let out even the smallest whimper. :)

I had one pound of beans already on my pantry shelf (@1.75/lb), but found a 5-lb bag much cheaper (@$1.00/lb) at a restaurant supply store, so I bought that not knowing how many beans I was actually going to use. I calculated my cost at the more expensive price, since I ended up only using that pound of beans I already had. Next time though, I will be able to use the smaller figure. :)

Leftovers: 
We had a lot of rice and chicken leftover! My goal is to get better at having food leftover so I'm confident everyone is getting enough, plus having extra in the event more guests arrive. Anything leftover makes a great Monday night supper, or lunch for Aaron at work, which he took today and thoroughly enjoyed. We had a good 12-15 cups of [fluffed] cooked rice left, and about 6 cups of chicken. All of the veggies got eaten, as well as the salsa, corn, and beans. I had bought the cheese in a 5lb. bag, so I had lots to take home still. Also there was between 8-12 oz. of sour cream left.

Looking back: 
I should've made twice as many beans. Because I was planning to mix it in with the chicken to stretch it, I didn't do a whole lot in order to keep it from being too beany. That one pound of beans were finished off right away and half the guests didn't have them as an option for their burritos. I guess they were more well liked as a topping than I anticipated! (I know I love beans, but didn't think everybody did!) I should've had another lime for the rice, and I also should've provided a little more lettuce and tomatoes. I think we had just enough.

This was one of my more expensive crowd meals, but I was aiming to try to serve more than usual, since I was aware of a few extra guests coming, and also because I wanted to try and plan for leftovers. Still, in planning on cooking for 40, I was able to get in at exactly $1 per serving. And the leftovers (enough for a couple meals), I will call free dinners for my family. This is a bit more than I hope to spend for a Crowd Meal, but considering the leftovers, we're alright. As long as I don't go over a dollar per person, I'll still call it a fairly inexpensive meal overall.