Showing posts with label stocking up. Show all posts

Friday, June 8, 2018

Our 2018 Garden


Memorial Day weekend is known in these parts as official garden planting time! Our last frost was technically a week and a half earlier than that, but we have been so busy that even if I could've planted earlier, Aaron wasn't able to till until that last weekend in May.

I had already put our spinach and lettuce in weeks earlier, and it has taken off! Our first spinach picking needs to be today, and I expect to start harvesting lettuce sometime next week. By start I mean, picking enough to bring inside for a salad. Adam and I have been happily munching on our frequent visits to check on the plants! He is a salad boy all the way, and helps himself to all the lettuce he can.


It was high time we got our tomatoes transplanted, as they outgrew our little greenhouse before any chance of frost was behind us. I stored them all on cookie sheets so I could easily bring them in for the night until it was warm enough to keep them outside uncovered. In the picture above, you can see how much taller the plants were than the shelves! Unfortunately, the shelving isn't adjustable. 

We feel like we nailed it on our tomato plants this year. It has been the most successful year yet! I started them March 20 in little Jiffy pellets, and transplanted them into 16 oz. plastic sour cream containers that I had saved. They took to the transplant so well, it confirmed that the potting soil wasn't our issue last year. I really liked having the plants in the containers. It worked well watering them from the bottom so they only soaked up as much as they needed. It was also fun to be able to watch to roots grow and see if that size container was big enough for 4 weeks of growing. When I transplanted them, the roots were definitely ready for some more space, but I don't feel like the plants were harmed any from crowding. 


I labeled some of my pots so I could keep track of varieties and other notes I though were worth keeping. This tomato plant was one that grew out of the bottom of a Jiffy pellet that I had pulled out and decided to transplant just to see what it would do. This photo was weeks later, and even now after 2 weeks in the garden dirt, you can't tell the difference between it and the rest of the tomato plants! 


This was another exciting success! I have tried every single year, for 4 years now, to plant flowers from seed. I finally got one to grow and BLOOM! Granted, it is just one, but it's one success. This marigold was a welcome sight! Unfortunately though, it did not survive the transplant into the garden, and I'm not even sure why. I guess we can always try again next year....


Adam has been my faithful helper and was excited to help carry plants from the greenhouse to the garden. He decided it was much more fun to carry them on top of his head. :)

He also enjoyed running the shovel digging the holes for the plants. We transplanted most of them in the evening when Aaron was home to help (and the one year old was in bed for the night), and I realized as I went to finish the next morning just how much longer it takes when I have a 17 month old to look over while also supervising the ambitious 2 year old single handedly. 

I was so confident I could do it by myself, but it was Daddy appreciation day. 
He does way more to help with our garden than I realized!


Due to not having enough stakes (and not wanting to buy more), we decided to try a stake-less method to caging tomatoes. We drove the cages into the ground a couple inches, and packed dirt around the bottom to hold them. Since we have an electric fence, we shouldn't have to worry about deer running into the cages, which was a problem we ran into last year when we thought for some reason it wasn't worth it to put the fence up. 


One week and a good rain or two after putting our garden in, the tomato plants were starting to bloom, and the corn was two inches tall. We had the perfect germinating weather! Our green beans, cucumbers, and okra didn't get in until at least a week later, and I have yet to see one of those popping out of the ground.  


This double corn plant is compliments of Adam, who thought he needed to plant his corn seeds right next to mine. 


Something we did different this year was take a little extra time for a better looking garden. We squared the edges, made it a little smaller for efficiency (we never planted the whole thing anyway), and made sure our rows were straight. Every year previously we thought we were planting straight rows only to realize the were at a terrible angle because of the odd shape of the garden. We have enjoyed looking at our garden this year already more than any other just because we took the time to do it right, which really wasn't much extra time, it just needed to be done. 

I'm looking forward to seeing what a difference these next couple weeks make, when we can see a garden full of neat, green rows!


Saturday, April 14, 2018

Homemade Garlic Powder


I love trying new things. Especially when it involves eliminating waste or saving money!

A more recent experiment was attempting to make garlic powder. 


Last summer I bought a bunch of fresh garlic bulbs from the produce auction. We like to use garlic for all kinds of things, from making salsas, sauces, and garlic bread to get-well remedies and poultices. (It is our number one household healer for sickness!) Since it generally stores pretty well, I knew I wouldn't have to worry about trying to use up a half-peck of garlic right away. 


My goal with most of the fresh garlic was to mince it and keep it on hand in the refrigerator to use instead of garlic powder. I find the powdered form to be pretty pricey, and haven't seen it under $11/lb. Because fresh garlic is more potent, I don't have to use as much when I'm cooking. I adjusted my cooking habits to use fresh for everything except salad dressing and veggie dips. 

A few weeks ago, Aaron noticed a bunch of cloves were starting to dry out. I sorted what was left, minced the cloves that were still good and moist, and decided to make garlic powder with the rest. 


Here's how I did it. 

First, I took the skin off the garlic cloves and placed them on a sheet pan. For quicker dry time, I sliced/chopped the garlic into smaller pieces. 

I don't have a dehydrator, so I used my gas oven instead. Since it doesn't have a standing pilot light, I heated it up just enough to get it warm inside. Then I just let it set in there and I waited, checked on them, and waited some more. It took more time to completely dry out than I expected, but it was nice that I didn't have to keep an eye on it. I truly forgot about it a few times but it didn't matter because it wasn't going to spoil! I reheated the oven no more than 1-2x per day. Within a couple days, it was all dry to my satisfaction. I wanted to make sure they were dried out enough that it didn't get gummy when I went to blend it into a powder.

To blend it, I used my Magic Bullet. That thing is a workhorse! It has been used sooo much in the 6 or so years since I bought it. It's perfect for working with smaller quantities or heavy-duty use. Making salad dressing is probably the most mild thing I've ever use it for. Usually it's frozen fruit for smoothies, or other harder items like dried out garlic, which pretty much resembles rocks.


The Magic Bullet ground it up in a jiffy! We ended up with exactly 4 ounces of garlic powder. I wish I remembered how much I paid for the garlic so I could compare cost with store-bought powder. (I paid somewhere between 35-55 cents per giant bulb.) Whether making my own garlic powder is cost effective or not, these cloves were destined for the garbage, so "repurposing" them was a money-saving endeavor!


Monday, April 2, 2018

A Peek Inside My Grocery Budget

At the beginning of the year, we implemented something new...
A real-deal, honest-to-goodness grocery budget. 

We had talked about budgets numerous times, and have attempted trying to figure one more than once, but we literally didn't feel like it was right for us. We are savers and penny-pinchers as it is, and have been keeping track of where our money has gone ever since we got married. We've looked back and made mental notes and changed habits along the way. (Maybe that is a form of budget? I dunno.)

Being a money/numbers nerd, I decided I wanted the challenge of a budget to see if there were more ways I could cut my spending. Plus I like using cash, so this was a great way to make sure I had cash on hand. It has already eliminated my need to ask Aaron for his wallet! 

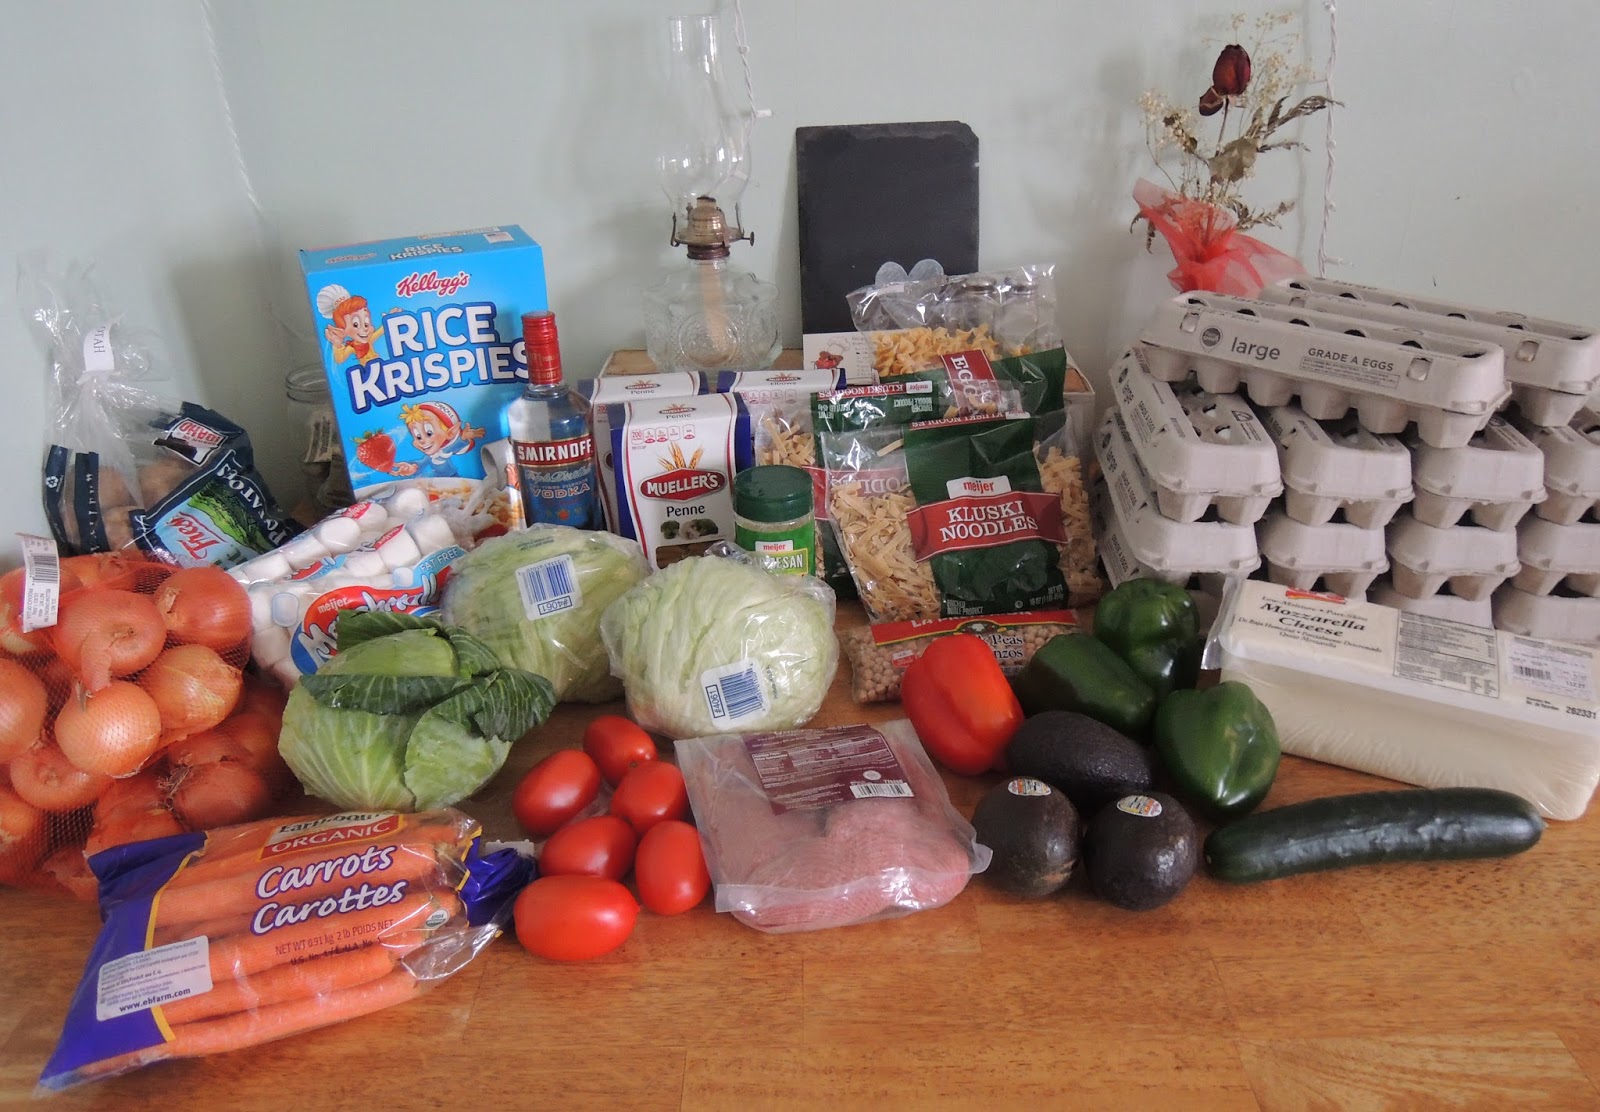
Looking back on last year's average monthly grocery bill, I figured $200 sounded reasonable. It was enough less than our 2017 average that I would have to be a little more conscious of where my money was going, but not a huge enough difference that it would feel stressful. I am feeding two adults and two toddlers, and serve a meal to 50 people once a month (I allot $50/mo. for the crowd meal). This budget does not include beef for our family, which we buy by the partial cow every couple years.

After giving it a try for a few months now, I am excited to report that I have successfully made it through the first quarter under budget!


January.
I did not do a full crowd meal (only dessert), but did make several meals for large families with new babies. 

My larger bulk purchases consisted of a 2.5 liter container of olive oil and a couple pounds of onion powder. The oil will last me until September. Total cost of bulk items was $46.15.

At the end of the month, I had $4.13 left.


February.
I made a full crowd meal and dessert, but already had about 1/3 of my ingredients covered, since I made turkey noodle soup using a turkey I had in my freezer.

Bulk purchases included vanilla beans and vodka so I could make my own vanilla. While it was a small investment up front, it will save me a LOT of money, since I only use real vanilla. To buy another quart of what I had been using previously would've cost me a whopping $80. I also bought a 50 lb. bag of wheat berries so I can continue grinding my own flour for bread and such. Total cost between the vanilla making supplies and wheat berries was roughly $46.

At the end of the month, I had $2.29 left. 


March.
I made another full crowd meal and dessert, and my cost into that was around $39.00. I have had a blog post typed up for a couple weeks now, but never got around finishing one last money figure so I could post it for you! 

As far as bulk purchases, I had bought a 10 lb. block of cheddar for this month's crowd meal, and ended up with 7 lbs. left for personal use. My goal was to chop it up and freeze most of it so it would last us awhile, but something happened ... and it got eaten before it made it into the freezer. Instead of mourning the loss of 7 lbs. of cheese, I was glad for the extra treat and the delight I saw on my husband's face every time he grabbed the block for a quick snack or sandwich. He loves cheese, and it made me happy to see him happy. Not to mention the kids excitement over a slice for them, too! And my baby learned to say the word "cheese" over all this. Cost into her education... I mean, the 7 lbs. cheddar, was $20.23.

I had quite a bit left over when I reached the end of the month, which allowed me to buy several pounds of butter at $2/lb. I happened upon the sale (and needed more butter anyway), so it was nice to have the money in my wallet so I could take advantage of it! Stocking up on butter cost me $12. 

Rather excited about the numbers this time! We had $23.62 left at the end of the month!

~

Interesting fact: I made a meal plan for January and February, but did not put one together in March. I'm curious if this had anything to do with how much we had left over at the end of the month? I find if I don't have a new selection of groceries I'm forced to get creative with what I do have. 

Other random interesting fact: We had beans with rice no more than once per month, and each time they included more expensive ingredients to dress them up ... like meat, cheese, and sour cream. By the way, I think I've created the most delicious form of beans and rice. Problem is, I hardly measure things so I'm not really sure how to share the recipe with you. 


Tuesday, March 20, 2018

First Day of Spring


My seeds have been started!

First thing this morning (after breakfast, of course), Adam and I went to work in the dirt and officially started our 2018 gardening season. I thoroughly enjoyed having a little helper working alongside of me. He was so excited to be able to help and happily watered the starting pellets and watched them grow. He is so detailed and careful for a two year old, and took his job seriously when I let him plant the pepper seeds.


I had a hard time figuring out how many of each item to plant, since I'm hoping to sell some produce on top of stocking up and feeding my own family, so I just threw some seeds in the dirt and we'll see how we do! 

I'm going to try three different tomato varieties: Roma (since they bring a high dollar at the produce auction and are a specialty item), Beefsteak (because who doesn't want a giant tomato or BLT sandwich), and Amish Paste (because this is my tried-and-true paste tomato. It has never failed me in all my gardening years, even while I've attempted and failed growing a number of other varieties.)

For peppers, I'm using seeds I had left from previous years. Besides bell peppers, I used up the rest of my jalapeno seeds. I'm hoping to sell those. There weren't any at the produce auction last year, and there are always gobs of men who attend, so I figured I'd take the chance and watch the market!


In addition to the tomatoes and peppers, I decided to try some flowers, too. I've never had success with them, but I have too many packets of seeds sitting around unused. Ideally I should have started them weeks ago, so I guess you can call them an experiment, too. (But then again, what do I do that isn't an experiment?) The varieties I planted are Marigolds and Evening Primrose. 

Evening Primrose are known as an enthusiastically spreading plant. I'm going to see what it does here in Mid-Northern Michigan where it gets below -10*F in the winter. I had the seeds so I thought I'd give it a shot. Another experiment I guess.... but this one is not going in my produce garden! 


Friday, March 2, 2018

Deep Freezer - Before and After Organizing


....Aaand here are the results of my freezer cleaning!

A couple weeks ago, I posted my brim-full refrigerator before picture, and a nice, sparkly after picture, along with a teaser of my deep freezer before picture, which revealed a freezer so full it's about busting at the seams. As promised, I have returned with an after picture and a list of what's really stored inside!


The main reason the freezer was so full is because I had just received a cows worth of beef bones, which I turned into some delicious bone broth. Once I was able to clear those out, I finally had room to rearrange and take inventory of what was inside.

I had a pretty good idea of what I had before I started, since the freezer came with these nice handy, dandy dividers where I can section off categories like ground beef, steaks, roasts, etc. These are super helpful because we buy our beef in bulk and can fill up an entire section with one variety of cut rather than everything being strewn about and it being a treasure hunt whenever I manage to dig below whatever is on the surface. 

Because of this, I did not dig through the steak section to see exactly how many of each cut I had (round, sirloin, etc.). Knowing I had an almost-full section of steak was good enough for me to know we weren't going to run out anytime soon!


Ta-daaa! 

Here it is! The after shot. Still full, but much neater.


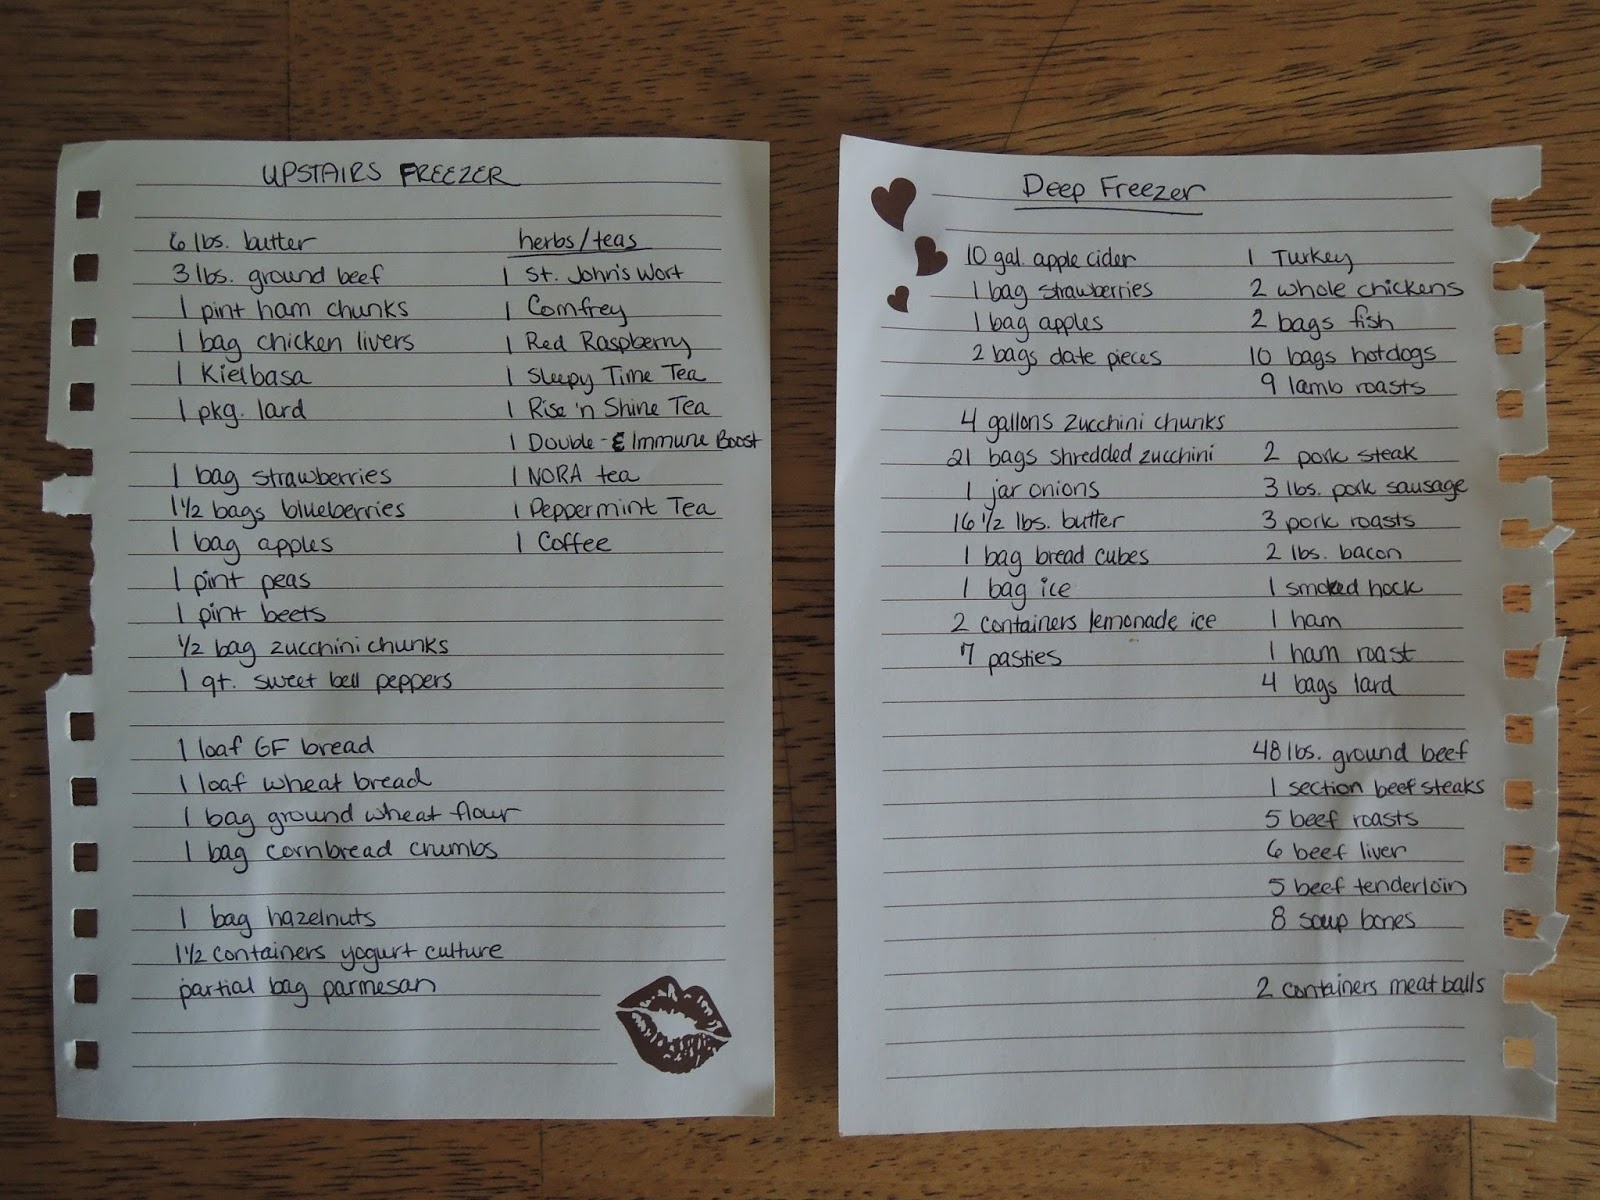
And here is the inventory. I included the list of my upstairs refrigerator/freezer inventory, since I am frequently transferring things between the two.

Since making this list, I have used up the whole turkey, a roast, some steak, a bag of zucchini, the beets, a bag of hotdogs, and several pounds of butter. It has been nice having this list handy so I can plan my meals accordingly without having to open my freezer, although I do sometimes get better inspiration when I see the actual food. :) 


Want to know what's cooking? I have a beef roast in the crock pot at this very moment! Mmm.


Monday, February 5, 2018

Planning to Plant


My seed order has arrived!

This is by far the record earliest I've gotten prepared for gardening. I sent in my order in January. Looking back to the first summer we were married, that year I received my seed order in uh... April.

I never thought I'd catch myself getting excited about gardening. Back when I worked at Farmer's Markets, I remember hearing a born-farmer say he started his in January, and my eyes bugged out and probably did a little eye roll because I couldn't believe anybody could be so passionate about having a green thumb. But here I sit, the first week in February, with my seeds all ready, waiting for the snow to melt and sun to shine so I can get some seeds started! Since I'm in north-central Michigan, I can't actually plant outdoors for another 3 1/2 to 4 months. My tomatoes and peppers will be started indoors sometime in March though.

When I sorted out my seeds from previous years, I found I had enough left over of a few items that I didn't have to order quite as much as I had anticipated. We did order heavy on green beans and corn, since these are two items we have or will have used up our stock by summer. We're planning to mass-produce these crops so we can store away enough for the next 2-3 years. When I get tired of canning/freezing, the rest will be either sold at our roadside stand or taken to auction. I am purposely planning a little bit extra to sell, since last year both of these items brought a pretty high price at the produce auction. Beans were up to $22/bushel, and from what I remember, corn was hardly under $3/doz., unless sold by the giant bin.

Other items I bought seeds for include cucumbers, red beets, lettuce, spinach, roma tomatoes, wildflowers, and cut flowers.


The roma tomatoes are for an experiment. I am planning to make a double batch of ketchup this year, but don't really need to stock up on any other tomato products. Ideally a paste tomato works best for ketchup because you don't have to cook off as much juice. I have a tomato variety I like already, but am unsure how well it would sell at the produce auction, so I decided to try my hand at growing romas so I can send whatever I don't need to the auction. They are a common, specialty paste tomato that gathered a high price last year, but was in extremely limited quantity and only was available every couple weeks, even though the auction ran two days a week. We'll see how well they do! To date, I have only had real success with my favorite Amish Paste variety, so it will be interesting to see if I can get romas to grow. 

The wildflowers are because I would like to add some more visual appeal to my garden. Plus, my in-home summer decor is usually made up of fresh wildflower bouquets (often picked and carefully arranged by my sweet husband!). I've tried growing flowers in the past, but have never been faithful in watering them, so they've never come up. I'm hoping this year we'll be seeing nice patches of colorful blooms that we can enjoy all summer long. 


Last week I got to go on a fun shopping trip. Aaron has a rewards card at ACE hardware, since he shops there fairly often for work. We get coupons in the mail every month, and after spending so many dollars (earning him a certain number of points), he'll get gift cards usually for $5 off a purchase of $5 or more. In January, it was ACE's anniversary, and they sent out their rewards members a $10 gift card to be spent on a $10+ purchase. The calendar month flew by, and before we knew it 1/31/18 was here, and the gift coupon was expiring. Since we literally can see the parking lot lights from our house at night, and can't let free money go to waste, I received the honors of browsing the store to use the coupon. It was like a field trip for a stay-at-home mom! I bundled up the kids and went out one wintery afternoon and we rode the cart up and down those aisles. It was quite fun being able to take the time to answer all of Adam's "what's that?" inquiries without feeling like he was taking up precious need-to-focus shopping time. 

This is what we walked out of the store with! A hose nozzle and a piece of caramel (not pictured. It didn't last that long!) that we paid a grand total of 34 cents for! The nozzle was $9.99, but since the purchase had to be $10 in order to activate the coupon, we bought ourselves a treat for the short ride home. I had been needing a hose nozzle for the past few years, but never took the time or money to go out and buy one. Instead, I've spent the past few summers freezing my fingers off by covering the hose opening with my thumb to adjust the spray. Now I have a handy dandy, [almost] free nozzle that I can use! My fingers are already excited to be saved from the ice-cold well water.


Friday, January 26, 2018

Canning Bone Broth

Working on reorganizing my deep freezer has been kind of a process during the past couple days, because I was given over 20lbs. of beef bones this week. My Tuesday through Thursday involved making two large batches of bone broth and canning it!


Just add a few carrots (no peeling required!), some celery (leaves and all), onion chunks (only remove the very outer thin peeling), and a splash of apple cider vinegar and cover with water. Let simmer for 24 hours (or a little more), strain through a sieve, add salt and pepper to taste, and cool enough to skim off the fat. Unless you want a 1/2 inch or more of fat in all of your jars. I LOVE meat fat, but not in my broth. I'm not super picky on removing all of it though.

These bones had quite a bit of meat on them still, and I was able to salvage some nice chunks during the straining process. I know some of the flavor will have been cooked out into the broth, but the meat is still good enough to use in something like soup. I saved about 5 cups worth of meat scraps and plan to make borscht on Monday. I had a quart of chopped beets from our garden that I saved in the freezer specifically for a batch of borscht. You can find my delicious Russian beet soup recipe in another blog post here. 


I filled my pressure canner a record-full with my last batch. 19 pints! I purposely used a couple of my narrowest pint jars so I could get all of it in. I didn't want to have to put some in my refrigerator and have to come up with a way to use it later this week. Check it out! 10 on the bottom - 9 on top.

 (Note: a quick check just now revealed that apparently the manufacturer says it can hold 19 pints, so this isn't as great a feat as I thought. I know I couldn't have have fit 10 on the bottom if I used all Ball jars though. I tried.)


This was also the first time I got to try canning on my new (vintage) gas stove! I loved it. I actually had room for my giant canner, plus I didn't have to worry at how well the burner would hold that much weight. I definitely prefer canning on a gas stove!


By the way, if you're looking at investing in a pressure canner, I can not recommend more highly the All-American brand. It's not only heavy duty with handy wing-nut closure, but it has this awesome gauge that tells you how you're doing at maintaining proper pressure. No more having to listen so intently to the jiggle of the weight!


How is this view so satisfying?