...to be adding to our family February 2017!
Monday, June 20, 2016
Thursday, June 9, 2016
Extra cash?
Looking for ways to save money on your everyday purchases?
Ibotta is an app I use to get cash back on my visits to town. Though I usually use it for grocery items, lately I've been frequenting Joann Fabrics for our camper remodel project (more on that later), and have gotten a total of $15 back from Ibotta as a result. It was all from shopping trips I had to make anyway, but the money back was a bonus!
Here's how it works: Browse their rebates and clip them just like you would a coupon. Shop at the participating groceries, restaurants, gas stations, pharmacies, even clothing stores and take a picture of your receipt on the app when you're finished. It's all done in an easy 1-2-3 step process.
One of my favorite things about Ibotta is you can use it in combination with other coupons and sales!
Check it out and start saving on your weekly grocery bill! There is a special running for the month of June where if you redeem your first rebate within two weeks, you'll get a $10 bonus, too. :)
Monday, May 30, 2016
Stocking Up
Yeah, so apparently I'm not good at routine.
I had every intention to blog for a whole week on food budget, but days passed and I got more and more behind. I still want to share with you on my shopping trip for the week though! In one of my last posts I told you I was out of a few staples and was planning a shopping trip. Here's what I bought:
Carrots, celery, butter (enough to hold us over since it wasn't on sale), dry beans, salted sunflower seeds (a great go-to snack), napa cabbage, spaghetti sauce, tuna fish, 2 dozen eggs, and a 50lb. bag of whole wheat flour (not pictured).
Total: $62.38
Supper that day was stir-fry, using the cabbage, a few carrots, and ingredients I had on hand such as rice, steak, and I can't remember the rest. I think I used some of the sunflower seeds, too.
I still had the ham bone and some extra meat leftover from the ham I had cooked earlier in the week, so I used that to make soup using the carrots, celery, and beans I had bought. There was enough soup for a supper and leftovers for a couple of lunches.
The rest of the miscellaneous items were for stocking up purposes and most of them are still sitting in my pantry waiting for use. I still have some carrots and celery in the fridge and they are being eaten as snacks. Carrots and all homemade ranch dip, or celery with peanut butter. Yum!
Thursday, May 12, 2016
Leftovers
Some people can't stand 'em.
Food tip #2: Save time - don't cook for just one meal.
In our house, leftovers can be a reason to celebrate! Have you ever ate something and exclaimed that you could eat it every day? Well, why not at least go for two? Don't get me wrong. There are some things you don't care to eat two days in a row, but in general, we are not a picky household and leftovers of a good meal are always welcome.
Sometimes I even plan for them! Certain dishes just make sense to prepare enough for two meals. If you're spending the time and energy in the kitchen anyway, don't bother cutting the recipe in half. When we were first married, my Grandma offered some advice in caring for a home and cooking for two. I grew up with twelve siblings, so cooking for two wasn't just a cut-amounts-in-half sort of adjustment. Thankfully I transitioned fine and we never had an overabundance of leftovers in those first few months. One of the tips Grandma gave me was don't cook for just one meal. Make enough for two and either freeze the other half or refrigerate as leftovers. It saves a ton of time in the kitchen that way! But to go along with that, she recommended only serving enough for one meal. If those seated at your table have to look at a full dish of food, you'd better expect them to want to try to eat it all, even if they have already had enough to be satisfied. There's a psychological reason for it somehow. It's the same reason that caterers don't have ALL the food out when the first people get in line. They'll see there's an abundance and help themselves to a feast, only to have the last in line have to pick through what's left. Make sure you serve plenty to your family though, and don't skimp for the sake of leftovers and one less afternoon in the kitchen.
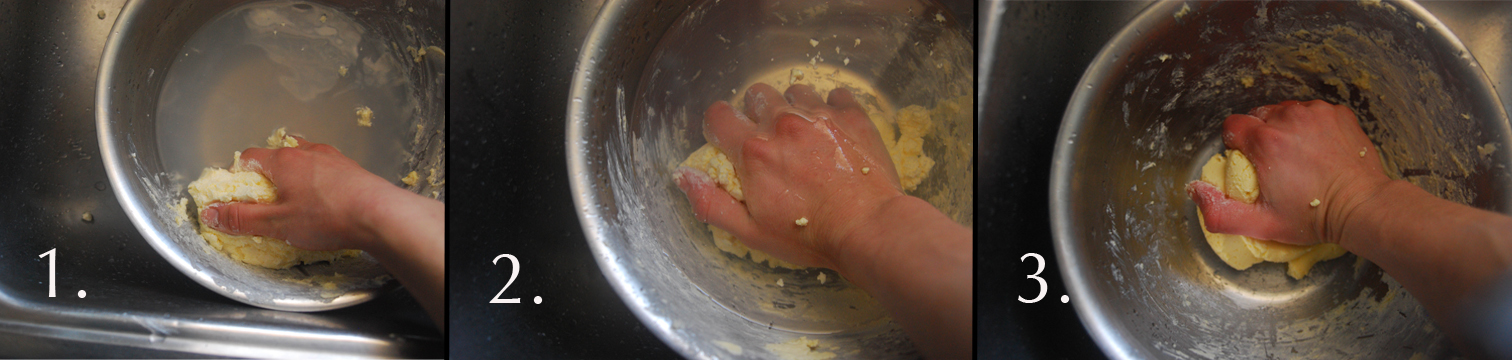
I'll have to share the recipe sometime to one of my favorite dishes to make double. It's a macaroni skillet casserole. It's a one-pot eeeasy, quick dish that is loaded with goodness. It was love at first bite for both of us. The way the recipe works I would've had to split several pints of canned goods in half to make enough for one meal, so it was less work to do the whole thing. Another bonus of this dish is it tastes even better the second day! There are plenty of dishes that do, as an overnight stay in the refrigerator is enough to blend the flavors for a fuller taste and enhanced greeting to your palate.
When serving leftovers, try to make them pleasing to the eye and not a boring second-day meal. Leftovers aren't always the most visually appealing and I think that could be a reason some aren't fond of them. We as a people often choose our food and eat based on appearance, though a mighty flavor can live in a plain-looking dish. If it's a meal with cheese, try adding a fresh sprinkle to the top before serving! Or add some parsley so you have a little bit of fresh green color to your plate. Be creative and think of how you would want your meal to be delivered to you.
For a recap of yesterday, I spent all afternoon hanging out with my husband at work and didn't return home until supper time, and around three minutes before my husband pulled in the drive after me. That's enough to make an unprepared wife panic. But leftovers came to the rescue! I kind of felt bad, but there was plenty of baked beans and potato salad left from the night before. Not to mention all that ham! As I reheated the beans I was trying to come up with a new way to prepare the ham or else find a new way to get some protein so it wasn't a carbon copy of the previous night's meal. Then hubby walked in, snagged a bite of his beloved potato salad, and asked what was for dinner. Instead of crumpling into a heap at his feet, he saved the day for me. He was looking forward to more ham! So our meal was exactly the same, and we enjoyed every last bite!
Food tip #2: Save time - don't cook for just one meal.
Wednesday, May 11, 2016
Food Budget - Day 1
Time for an update on yesterday's meal! The menu did in fact go as planned, but baking time did not. Oh well. Reality. It was good, though!
Dun-dun-da-duh! (Drum roll)
The main dish was ham! The first I'd ever made, so I forgive myself for it being done an hour later than I was hoping. We had been given a 10lb ham several weeks ago and I'm rather excited about the mileage we'll be able to get from it. I can think of several ways to use the leftovers, and hubby chimed in with a few more as he helped me put away the leftovers last night. Ham is a rare thing here. (I mean, I did say it was my first time cooking one.) Pork is not our meat of choice, but both my man and I agree there is an exception for bacon, ham, and sausage. So basically anything that doesn't taste like plain pork.
What I served with the ham? I made homemade baked beans, also a first. I pulled out my recipe book *for the first time* and compared all (five) of the bean recipes I had with each other. Most of them said to bake for 5-7 hours, but it was 3pm when I got started, so.... I used ingredients from some of those recipes, but followed the baking time a little closer for the one that said two hours. haha! The ham took an extra hour to bake, so my beans did too. It ended up being more like four hours then. A happy medium, I call it!
A potato salad also accompanied the meal. It was a rather chilly cloudy day and I was beginning to wish the ham was done the day before so it could be soup day. Potato salad? I know I've been waiting for non-winter weather so it's season for it, but couldn't I have done baked or mashed potato? But... when my man walked in the door for supper and saw the bowl on the table from across the room, he asked if it was what he thought it was. He LOVES potato salad! It was a housewife-helpmeet win. Maybe not ideal for a cold day, but it was perfect to please the husband, and that is important when planning your menus, budget or not. In this case it was an inexpensive way to make him happy, but I recommend even spending a little extra to get him some food he really likes. Your job isn't just feeding your man, but making him happy, which is basically the same thing.
Food tip #1: Make sure husband is happy. Even if it costs a little bit extra.
Tuesday, May 10, 2016
Food Budget - How Do I Make it Work?
This week in one of my mommy groups, the subject of food budgets came up. Everyone was sharing what they spent, how they saved, and how they made feeding their family work. That got me to thinking how I really save money in the kitchen. I know my food budget is pretty small, but how? What have I done differently to keep expenses low and still eat healthy? I know I garden and use that produce during the winter, but I don't can everything. So, I have been inspired to pay attention to what I do, not change anything from my "normal" routine, and come back here with a report. The timing is perfect because I haven't had any time to plan menus and stock up special for you blog readers. Currently I have a pretty big list of things in my pantry that are in dire need of restocking (like, these staples are gone). This way you'll be able to see that I do spend money!
It's Tuesday, so basically the start of a new week... ish. Yesterday for dinner I made fajitas, which consisted of some steak I had in the freezer, peppers that I had chopped and frozen from our garden, homemade tortillas, and sour cream that I already had in the fridge.
I guess I should warn you first. We don't eat multiple dish meals on a daily basis. One reason for that is because it's not practical for us. I'm feeding two adults and a baby, and we don't eat a ton. It doesn't make sense for me to serve a fraction batch of rolls or open several different cans of vegetables only to have half of them sitting in my fridge waiting for me to come up with another way to use them up in the next few days. I do it on occasion when I know I'll use them, but as a general rule I try not to fill my fridge with little bits of food. I prefer leftovers to be enough for a lunch meal or else another days dinner. Now that the little guy is eating solids, it's a bit more frequent that I have partial jars in the fridge, but I try to feed him from the ingredients that we're also having for dinner.
Breakfasts and lunches are pretty random, too. I used up our last egg yesterday, and we were out of bread (I'm baking more as I type), so I made me a giant pancake for breakfast, with no egg, since we're fresh out. It's 1pm and lunch is going to be some leftover Shepherd's Pie from a couple days ago. I have supper planned, but there are times that I change my mind last minute, so I'd best wait to let you know what I've actually made after the fact.
Come follow along on my adventure! And feel free to comment with any questions.
Friday, April 22, 2016
Homemade Butter
Milk, yogurt, cheese, and butter have been plentiful in our house lately! We rarely have enough dairy products to keep us satisfied. Somehow it always gets consumed shortly after making it through the doorway. Well, try getting a cow! Or better yet, have your brother take care of one. I can't tell you how many gallons we've gone through in the past two weeks, but we have certainly had our fill!
Allow me to introduce you to homemade butter. It's so good I could eat it plain. For real. And this stuff is so easy to make! I have made a fair amount in my day using food processors, electric butter churns, and also by hand. The method I'm going to teach you uses a simple canning jar - by far the best, most efficient method I have come across when you have less than several gallons of cream on hand.
First off, you're going to need to separate your cream if it isn't already. I skimmed mine off the top of several gallons of milk. Place the amount you want to work with in a jar and heat to 70*F. It is really important that your cream is this warm, as it will cut down your butter making time tremendously! I split my cream amounts so my jar wasn't more than half full, and ran it under hot water until reaching the desired temperature.
Next step is shaking! Mix it, shake it, swish it back and forth. You may have noticed my little man's feet sticking out from behind me. He actually fell asleep while being jolted around!
You're going to shake it until it starts to separate and get transparent looking. You'll notice yellow bits of butter forming. At this point, you may want to shake it just a little bit longer, gently, just enough to bring the little bits together some. If you have really warm cream it will look greasy, and the more you shake it the greasier it will get. I guess you'll just have to keep an eye on it. When it looks like butter, you're good. Just make sure the bits can hold together and won't wash away when you start the rinsing process.
Rinsing Method #1
Pour the buttermilk into another jar or container and save for later. It makes some mighty tasty buttermilk biscuits! I just separate the buttermilk through a crack in my lid. Less dishes to wash that way! That's definitely a goal when I'm in the kitchen. :) Dump the butter into a bowl.
Next comes the rinsing. Your goal is to get all of the buttermilk washed out, as it helps the butter last longer. Buttermilk sours before butter, and will sour the rest of your product sooner if you don't wash it out. Because this is a natural product with no preservatives, it will naturally sour sooner than grocery store butter, but by washing it we are doing our best to help it last as long as possible.
Simply pour water over the butter and squeeze it back out. You can see I am working under water while I'm rinsing it. I use cold water to try to get the butter to harden some so it's easier to work with. Your water will be really cloudy at first, so dump it down the drain and pour more fresh water in. When I rinse my butter, I use a bread-kneading motion. Squeeze, turn, press, whatever it takes to make sure the buttermilk washes away. You're going to need to keep redoing your water as you work. When you can squeeze and the water no longer turns cloudy, your rinsing is done. Dump out the water, give your butter a final press, and salt it to taste, kneading it in so it spreads throughout.
Rinsing Method #2
At the advice of my husband, this post isn't complete without including another method of rinsing. Though I've made a some butter in my days (which ended up on store shelves across the lower half of Michigan), Aaron is the butter master. He has far outdone me in its production! Using an old-fashioned hand butter churn, he and his brothers have made hundreds of pounds of this stuff. They perfected the art. (He's the one who taught me the butter needed to be at 70* for ideal churn time, years before we were even interested in each other.) This is the method he used with the churn, only I'm going to teach you using my handy canning jar.
When your butter has started clumping together, pour the buttermilk into a container to save for later use. Instead of dumping the butter into a bowl, you're going to do all the rinsing in your jar. Pour cold water into the jar and give it a few good shakes. The water should be really cloudy. Dump the milky water out (you're done with it), and add more cold water to the jar of butter. Repeat this process until the water stays clear even after shaking. When all the buttermilk has been rinsed out, pour the water off and transfer the butter to a bowl. Squeeze all the remaining water out. Remember you want it as dry as possible so it keeps longer. Salt to taste, kneading and working it in so it's salted evenly. If you're like me, you'll sample it to make sure!
After rinsing:
Mold into desired shape, and you're all set!
With about a quart of cream I ended up with 8.3 oz. (1/2 pound) of butter.
Next step is testing it out on some nice fresh homemade bread! If you don't chow it down as soon as you've slathered it on, it's really good with home canned strawberry jam, too!
Subscribe to:
Posts (Atom)