Showing posts with label kitchen. Show all posts

Saturday, April 14, 2018

Homemade Garlic Powder


I love trying new things. Especially when it involves eliminating waste or saving money!

A more recent experiment was attempting to make garlic powder. 


Last summer I bought a bunch of fresh garlic bulbs from the produce auction. We like to use garlic for all kinds of things, from making salsas, sauces, and garlic bread to get-well remedies and poultices. (It is our number one household healer for sickness!) Since it generally stores pretty well, I knew I wouldn't have to worry about trying to use up a half-peck of garlic right away. 


My goal with most of the fresh garlic was to mince it and keep it on hand in the refrigerator to use instead of garlic powder. I find the powdered form to be pretty pricey, and haven't seen it under $11/lb. Because fresh garlic is more potent, I don't have to use as much when I'm cooking. I adjusted my cooking habits to use fresh for everything except salad dressing and veggie dips. 

A few weeks ago, Aaron noticed a bunch of cloves were starting to dry out. I sorted what was left, minced the cloves that were still good and moist, and decided to make garlic powder with the rest. 


Here's how I did it. 

First, I took the skin off the garlic cloves and placed them on a sheet pan. For quicker dry time, I sliced/chopped the garlic into smaller pieces. 

I don't have a dehydrator, so I used my gas oven instead. Since it doesn't have a standing pilot light, I heated it up just enough to get it warm inside. Then I just let it set in there and I waited, checked on them, and waited some more. It took more time to completely dry out than I expected, but it was nice that I didn't have to keep an eye on it. I truly forgot about it a few times but it didn't matter because it wasn't going to spoil! I reheated the oven no more than 1-2x per day. Within a couple days, it was all dry to my satisfaction. I wanted to make sure they were dried out enough that it didn't get gummy when I went to blend it into a powder.

To blend it, I used my Magic Bullet. That thing is a workhorse! It has been used sooo much in the 6 or so years since I bought it. It's perfect for working with smaller quantities or heavy-duty use. Making salad dressing is probably the most mild thing I've ever use it for. Usually it's frozen fruit for smoothies, or other harder items like dried out garlic, which pretty much resembles rocks.


The Magic Bullet ground it up in a jiffy! We ended up with exactly 4 ounces of garlic powder. I wish I remembered how much I paid for the garlic so I could compare cost with store-bought powder. (I paid somewhere between 35-55 cents per giant bulb.) Whether making my own garlic powder is cost effective or not, these cloves were destined for the garbage, so "repurposing" them was a money-saving endeavor!


Friday, January 26, 2018

Canning Bone Broth

Working on reorganizing my deep freezer has been kind of a process during the past couple days, because I was given over 20lbs. of beef bones this week. My Tuesday through Thursday involved making two large batches of bone broth and canning it!


Just add a few carrots (no peeling required!), some celery (leaves and all), onion chunks (only remove the very outer thin peeling), and a splash of apple cider vinegar and cover with water. Let simmer for 24 hours (or a little more), strain through a sieve, add salt and pepper to taste, and cool enough to skim off the fat. Unless you want a 1/2 inch or more of fat in all of your jars. I LOVE meat fat, but not in my broth. I'm not super picky on removing all of it though.

These bones had quite a bit of meat on them still, and I was able to salvage some nice chunks during the straining process. I know some of the flavor will have been cooked out into the broth, but the meat is still good enough to use in something like soup. I saved about 5 cups worth of meat scraps and plan to make borscht on Monday. I had a quart of chopped beets from our garden that I saved in the freezer specifically for a batch of borscht. You can find my delicious Russian beet soup recipe in another blog post here


I filled my pressure canner a record-full with my last batch. 19 pints! I purposely used a couple of my narrowest pint jars so I could get all of it in. I didn't want to have to put some in my refrigerator and have to come up with a way to use it later this week. Check it out! 10 on the bottom - 9 on top.

 (Note: a quick check just now revealed that apparently the manufacturer says it can hold 19 pints, so this isn't as great a feat as I thought. I know I couldn't have have fit 10 on the bottom if I used all Ball jars though. I tried.)


This was also the first time I got to try canning on my new (vintage) gas stove! I loved it. I actually had room for my giant canner, plus I didn't have to worry at how well the burner would hold that much weight. I definitely prefer canning on a gas stove!


By the way, if you're looking at investing in a pressure canner, I can not recommend more highly the All-American brand. It's not only heavy duty with handy wing-nut closure, but it has this awesome gauge that tells you how you're doing at maintaining proper pressure. No more having to listen so intently to the jiggle of the weight!


How is this view so satisfying?


Wednesday, January 24, 2018

Refrigerator and Freezer Cleaning and Organizing

Now that I've shown you my kitchen makeover (when I actually washed the hideous pile of dishes), I may as well keep going and update you on the rest of my house projects. I'm involving myself in a weekly "declutter challenge" that attacks a different area of the house per week. I'm loving that I get a whole week to take care of an area, because some of these weeks require more time for me to get the nominated task accomplished.   

*Moment of truth*: when I finally achieved my goal of clearing those kitchen counters a couple weeks ago, it wasn't just because I woke up one morning and told myself I was finally going to suck it up and get it done (after having it on my to-do list for a month), but rather because it just so happened to be the task for the first week of the declutter challenge. It was an extra help to know that other housewives around the world were working on the same problem area that I was. 

Fast forward to week three. This is the week to clean out the refrigerator and freezer. When I learned what area this week was, my first though was "well, at least my deep freezer is already organized", followed by a "don't they know I have more than just a little refrigerator-freezer?". My deep freeze is organized to a degree, but I've also acquired 50lbs of pork, 9lbs of ground beef, and a cow's worth of bones in the last week and a half, so it really isn't all that organized looking anymore. 

As far as the refrigerator, it was in desperate need of cleaning out. I had been making the excuse of there being snow on the ground, so I can't get out to the compost pile to dump out any bad stuff, plus I don't want to mess up the yard, to justify my putting it off for like... all winter. But since this was the task for the week, and the fact that the snow melted over the weekend, that was no longer a valid excuse. I was going to get it done! In order to keep myself from putting it off any further (you know, my habit towards last-minute stuff), I got right on it Monday morning!


Why is it so satisfying to see a clean, shiny refrigerator? Is it because I know there is no longer a puddle of crystalized maple syrup under the crisper drawer? (Honestly, I had no idea it was even there until I pulled the drawer out to clean.) It's nice to know that every crevasse has been wiped down. 

Next area: the deep freezer. I just took the first batch of bone broth out of the cooker, and will start another this afternoon so I can clear that much space before I tackle the actual cleaning and organizing of the freezer. It will be easier if I don't have to wonder where to put a few large items!


Teaser:


Stay tuned - an after picture is coming! Plus, I'll be taking inventory of the freezer, so check back later if you're wondering what's hiding underneath the top layer of frozen goods. :) 


Friday, January 5, 2018

#lamehousewifegoals

My lame housewife goal for December was to clear all my kitchen countertops. I wanted a clutter-free kitchen where I could think and create! For me, having a clean kitchen equals happiness. I can handle some clutter elsewhere, but when my kitchen looks nice, I can still breathe.

I'm here to announce that I made my goal!

In January.

I accomplished the huge task this week. On January 3rd. It seemed like an impossible feat especially after welcoming the new year. We were out of town for the weekend, and had food to prepare right before leaving, which meant no time to clean up messes. These before pictures were taken after our return home, January 2nd. Oye. This is what a lived in house looks like, folks! It's a moment of reality. Truth. I am not a neat, picture-perfect blogging mom. I'm a meal-cooking, diaper-changing, errand-running housewife. And clearly, by the pictures, anything but a cleaner. (Honestly, I hate cleaning. But I love the results. haha)


This is my kitchen. Isn't it LOVELY? You can see it! Look at the beautiful wood pieces my husband built for me. You can actually see the toaster. There's room to cook! All of a sudden my teeny kitchen, with no counter space and no cupboards, feels like it has room. It's not as small as it seemed. And today, I am enjoying it. I just want to kick back on this beautiful wintery day and look at the outcome of my labor. 


Thursday, January 4, 2018

Cooking for a Crowd: Episode 13 - Christmas Chex

My Crowd Dessert day just so happened to be the same weekend as their Christmas Party, so we went right along with the festive occasion and served a fancy holiday dish.

Christmas Chex!

I've been working on using up odd ingredients that I have in my pantry, so this is where the idea sprang from. One random item sitting on my shelf was a big block of white vanilla bark. Generally people use this in place of white chocolate chips, for coating candies and such. It was given to me once upon a time, and I figured I'd use it by making truffles or something fun like that. Problem is, truffles are not the cheapest treat out there (hence why you only get three puny ones for a giant price tag at a restaurant), so I decided it was not a good choice for a crowd dessert. Knowing how easy it is to pop three in your mouth... and feeding 40 people... I'd have to make over 100 just to be sure everybody got some. That sounded like a lot of work, and a lot of money, so instead I googled "what to do with vanilla bark". I found all sorts of unhealthy recipes! I needed one that would yield enough dessert to serve everyone with the 24oz. brick I had, so the Christmas Chex mix that seemed to flood Pinterest looked like the recipe that would make the most out of the vanilla coating.


The recipe I used came straight from the Chex cereal website. (You can find it here: https://www.chex.com/recipes/christmas-chex-party-mix/) I adapted it a bit to fit my needs and preferences, like omitting the mini marshmallows (ew!), and skipping out on the sprinkles, since I didn't have any and it wasn't worth my time or money to get some just for the sake of fancy garnishing.

So my version of this recipe used 4 basic components. 

PSA!!! Please note: I did not say ingredients. There are way more than 4 ingredients in this dessert. Things like Cereal, Pillsbury dough, Cool Whip, and Condensed Soup are not ingredients, but food items made up of multiple ingredients. It is my pet peeve when people call processed foods like these ingredients. All too many times I come across recipes advertised as "Easy 4 Ingredient Casserole" or similar, when in reality it is four pre-made, pre-packaged, unhealthy items that you just open, dump, mix together, and bake. Such recipes are falsely named unless it literally is four ingredients such as potatoes, butter, salt, and milk. In which case you can just call it mashed potatoes. Thank you. 


Where was I? Oh yes, the four basic components: chex cereal, pretzels, vanilla bark, and M&Ms. It also has a small amount of powdered sugar for coating. I had to go out and buy the cereal, pretzels, and M&Ms, since I didn't have any on hand (and don't generally). Unfortunately I wasn't able to find chex-like cereal at the store I was hoping to (where cereal is almost reasonably priced), so I had to go elsewhere and pay the price tag. I was able to get the store-brand, which saved me quite a bit over the brand name Chex, though still more than I was anticipating. The box of cereal cost me $3.29, the pretzels were $1, and the M&Ms were on sale for $2.49/bag (I only used half the bag). So my cost (minus the small amount of powdered sugar, which I have no way of calculating) for this dessert is $5.53. 

Total cost: $5.53 divided by 40 = $0.14/serving.

The amount was perfect for the size group I was feeding! There weren't any leftovers because people kept munching while socializing after the meal, but it did take awhile for the bowl full to disappear completely. A note for next time, or for you if you happen to try the recipe, is to add the M&Ms while the candy coating is still soft. The recipe asks you to put the M&Ms on after the mixture has hardened, when you break it up and prepare to serve, but I found that they just wanted to fall through the cracks and hang out on the bottom of the bowl. Had I known this, I'd have skipped the M&Ms entirely, except I still wanted the color pop they offered. So remember: add candies when the vanilla bark is still soft (preferably sprinkle them on right after you've spread your mixture on the sheet pans to dry). This way hopefully they will be able to stick some to the pretzels and cereal.


Thursday, November 9, 2017

Canning Tomato Soup

Ah yes, I have more to tell about my last produce auction buy. Remember the acorn squash? Those were a great deal! The other buy I haven't mentioned, is the tomatoes. Lots of tomatoes!

Where I live, our first frost is generally the second-to-last week in September. This has been SO different, in that we just got our first frost the last week in October! This extended our growing season a substantial amount. I just brought in the last of my spinach a few days ago, and that completed our garden. So at the October 13 produce auction, there were plenty of tomatoes. Since most people don't expect to find them this late in the year, their canning had been done months before, in the peak of tomato season. So with there not being a market for them anymore, they were going really cheap.

Our tomatoes did terrible this year. The deer ate off most of the plants, too much rain killed another one, and there just weren't many blossoms left after all that. We were able to get enough to keep us eating fresh, but our canning tomatoes came from elsewhere. A friend of mine let me come clean out her tomato patch after she was finished with her canning, and I ended up getting several bushels! From that, I was able to cross a few items off my "we need to can this year" list. I was even able to can a pot of tomato soup - something we had been wanting to do since we were married, but weren't able to get ahold of the recipe until now. Yeah, we could've found someone else's recipe, but this tomato soup is different, and so much better than any either Aaron or I have ever tried. We figured we could go through at least a quart a week easy, so the batch I made from the friend's tomatoes wasn't quite as much as we figured we could go through in a year.

Produce auction to the rescue!

I mean, since they have been going for a mere $1 a box at the end of the season, I could easily get a few boxes and finish off what we needed. Get double that, and we wouldn't have to can any next year! Since we're all over not having to can everything every year, this sounded like a great plan. So I bid and I bought. The problem is, I didn't know how many quarts I could get per bushel. It never even occurred to me until after I brought them home. That might've been a good thing to know ahead of time. I mean, the two of us have canned several bushels of tomatoes in one day before, so I didn't think much of it. But then we started counting.... and figured I had just brought home about 11 bushels of tomatoes.


It still didn't faze me. I was excited, I hadn't spent a whole lot of money, and we were going to get our tomato soup that we wanted! After I brought Aaron out to see my purchase sitting there in the bed of the truck, we came inside and he asked when I was going to can it. Of course I said "Today!" I've always known tomatoes to be a more fragile fruit, so it's best not to let them sit and rot. They are so much easier to work with fresh. So I was going to start canning that afternoon. My amazing, supportive, go-with-the-flow husband jumped right in and assumed he was going to help me with it. I wasn't going to ask for his help, but all of a sudden he was working along side of me. His next question was asking where I planned to do it all. And of course, I said my kitchen. I mean, where else do I go to cook? But him being smarter than me said "Look, my brother has a huge commercial kitchen with a 10-burner stove. We could go over there and whip this stuff out in no time!" We have a tiny kitchen. I only have two stock pots, can only use one of them on my stove at a time, but have a two burner outdoor propane stove that we could use. Still, with our limited countertop space, this would be a huge task, so my visionary husband hardly needed to twist my arm before we were loading up jars, ingredients, canning equipment, and the kids to head on over to the canning kitchen.


Besides all the stove burners, stock pots, and stainless-steel countertops, another perk was that we could hose everything down when we were done! It hardly made a mess, but still, its nice that we didn't have to worry about tomato getting onto everything

The soup was pretty easy to make. We took the whole tomatoes (skin and all), and chopped them into a stock pot, and added a couple finely chopped onions to it. Let it cook down until soft and run the mixture through the Squeezo (or Victorio) strainer. The strainer is what separates the good stuff from the pulp. To make things go faster (and to save our arms), Aaron hooked his drill up to the strainer. He managed the tomato washing, soup straining, and canning. We both chopped the tomatoes and stirred the simmering pots, and I prepared the onions, mixed up the rest of the ingredients, and washed the dishes. A couple of nieces and nephews came out to watch, which led to them begging to try running the Victorio! The few minutes of extra help freed up some time for Aaron to get the canners going.


This is by far the biggest cooking pot I've ever seen! It holds about 15 gallons. It's so big, my 6-foot husband could hide behind it! 


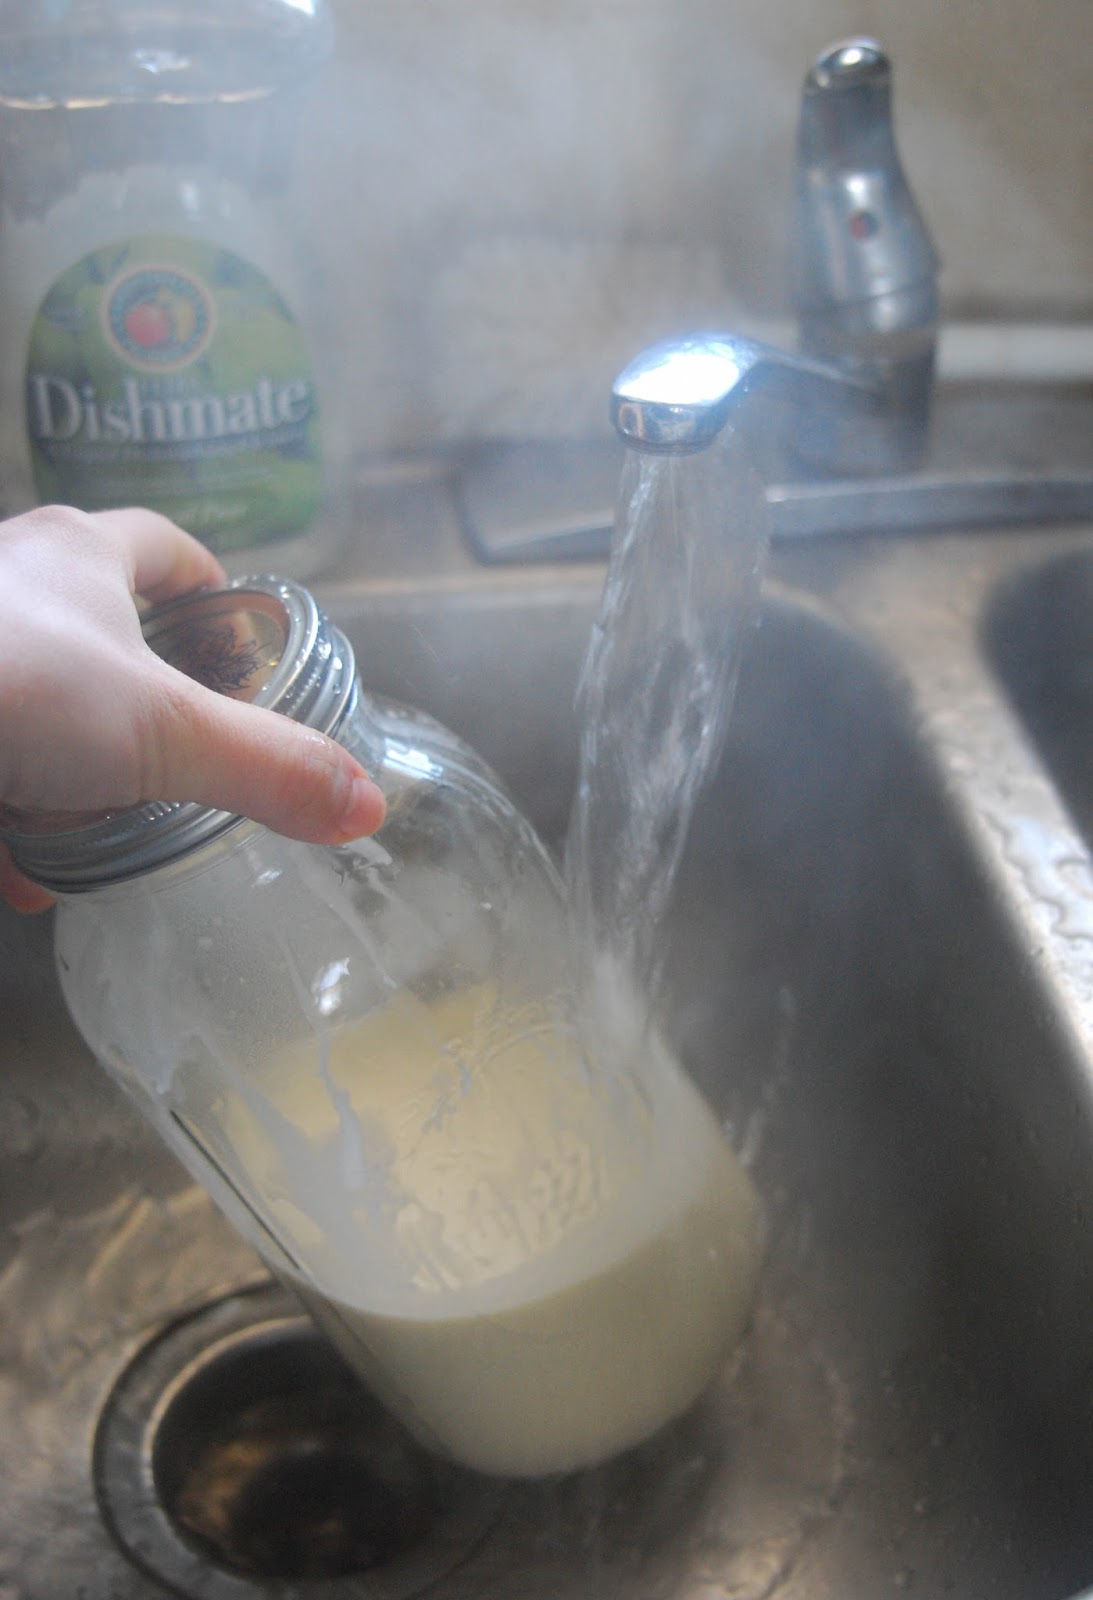
Because we didn't get started until mid-afternoon, we could only get about half of the tomatoes finished. The rest of them looked to be in good enough condition that they would hold a few more days pretty well, so we went back two days later (Aaron's next off day), to finish them. All in all, we ended up with 191 quarts! This was um, more than anticipated. I was hoping for like 100. Looking on the bright side, we won't have to can tomato soup again until after the year 2022. Another good thing was the fact that I already had that many jars washed and ready in the basement, so that cut down on some time in the canning prep. The first summer we were married we went out and bought dozens upon dozens of jars in all sizes for an amazing price, and we still have a couple hundred of those jars sitting in the basement unused. 


Also, while the tomatoes were cheap, there was other cost into the rest of the ingredients, like onions, spices, salt, etc. Calculating all our expenses and dividing it 191 ways, we figure we made it all at 50 cents per quart. That's not bad at all for a can of soup. If you went out and bought a small can of Campbell's soup (which isn't even comparable in flavor) at retail, you'd be spending more than that! With that being said, if you're in the market for some tomato soup, I might be able to work out a deal for you. Otherwise, don't be surprised if you happen to find some under your Christmas tree.


Wednesday, October 25, 2017

Find of the Week


Over the weekend I happened upon a yard sale out in the country, so as one might expect, curiosity made my car turn into the driveway. I was sure it was way past sale season, being that it's the end of October, but on a warm 70-some degree morning it just felt right.

The sale was a very small one, and I learned it was made up of leftovers from a yard sale they had earlier that summer. I was met with a good morning and a "Just ignore the price tags. Everything is name-your-price today." Just walk by her table, barely say "Would you take..." and she would say yes. I left with a few old Taste of Home and Quick Cooking magazines, since I love browsing recipes and am eager to try a few new ones this winter. I had been meaning to get to the library to borrow some but this deal was even better, because I don't have to worry about returning them, I can cut out recipes if I feel like it, and I don't have to stress out about my kids getting ahold of them. The other thing I found was something I have had on my yard sale "to-find" list for two years. I've been wanting a jar tall enough to store dried spaghetti noodles. My pantry is all on open shelving in my kitchen, due to a tiny house and very limited storage and cupboard space. I didn't realize how hard it was to find a tall jar until I decided I wanted one! In the picture above I have a gallon jar standing next to it for comparison. These gallon jars have always been the tallest jars on my shelves; they are even taller than Ball half-gallon jars. The new spaghetti jar towers over them all, and is absolutely perfect for what I need!

Have you found any exciting-to-you deals lately?

Monday, March 20, 2017

Eating Alkaline


In an effort to include more alkaline-forming foods in my diet, I've been experimenting with my own new recipes and reintroducing other yummy foods that I don't normally purchase on a regular basis. 

One of my more delicious meals features a knock-off oatmeal - made with millet, and enhanced with cinnamon, butter, and maple syrup. I kind of happened on it by accident. 
I thought I was cooking quinoa but didn't realize until I had eaten most of it that I had grabbed the jar of millet instead. I thought the texture seemed different but figured it was because I didn't cook it quite long enough (though I followed the directions... for quinoa), and it didn't click how vastly different the flavor was! You'd think I had never cooked either before. Well ... I hadn't, but I've eaten them both a few times in my day. 

The blooper ended up being much better, and I think a far more pleasing flavor too, than it would've been had I grabbed the jar of quinoa. The unfortunate part of this dish is after checking the two stores in town that sell bulk grains, I realized millet is hard to find, as neither carried it. I would guess the health food store in the "city" might, but I don't know. 

I'm not an oatmeal person (unless it's baked), so this discovery may add a nice variation to my old breakfast routine, which was most often just eggs and toast. Pairing the millet with an egg and grapefruit gave me a bit of protein and made it a well-rounded (pun intended) meal. Another reason I give this plate such a great rating is because I felt absolutely amazing all morning. Breakfast didn't sit heavy and lasted me well until lunchtime. 


Thursday, November 3, 2016

Homemade Rustic Bread


Bread is something we go through a decent amount of each week. If you read my recent post "Weekly Cleaning Schedule", you may recall I had Tuesday as bread making day. Two loaves a week, and often it disappeared before the week was over. Well, we still go through that much. At least.

My husband jokes that it's a good thing the Bible says "Man shall not live on bread alone", otherwise he'd do it. It's a staple! Pair it with a hunk of cheese and a glass of milk and he is one happy camper. I mean, growing up his family made four loaves a day, but if they happened to taste it while it was still warm, it was gone so fast they had to make another batch that afternoon. 

When we go on a mini road trip, we like to have some sort of treat along. Often I'll make a snack, or something a bit more hearty if I know we'll be missing meal time while on the road. Last time though, we decided to stop by the Farmer's Market in my old home town and pick up a hunk of cheese from the yummy can't-say-enough-good-about-it cheese shop I used to work at. We decided on a favorite of both of ours, a dutch baby swiss from Europe, called Leerdammer. Seeing as it was lunch time and the market also happened to have an open-air artisan bread shop, we picked up a nice rustic brown loaf to complete a meal. That stuff was so good we decided I needed to step my bread baking up a notch. I had been wanting to attempt a nice hearty loaf for quite some time now (and have tried in years past but failed miserably), but of the dozens of recipes I've looked into, they've all seemed so time consuming and involved. Or at least, it was a big recipe for someone who doesn't like reading directions. But I knew it was time to try my hand at it for real. So I searched for recipes once again and this time came up with a couple that looked like the perfect place to start.


Multiple batches later....

I have made more loaves of bread in two weeks' time than I thought I would when I started, but am sure I haven't spent a minute more than I would've on my regular sandwich bread recipe! You see, the other stuff I made required multiple risings, kneading time, and a few extra ingredients. Compared to what I've been making recently? Flour, water, salt, yeast... no knead, one rise, bake. 

Okay, I have two recipes that I've been alternating between since beginning this experiment. They're both very similar except one is a quick loaf (which I generally only make when I realize there isn't enough for Aaron's lunch for the next day.), and the other I mix up in the evening and let it sit overnight (12-18 hours). We really like the slight sourdough flavor and chewy texture of the soaked recipe. Plus it's super forgiving. I can bake it when I get up in the morning, or run errands and wait until mid-day and it doesn't affect it any! It literally takes 5 minutes of my time, including clean up. I don't have to worry about over-risen bread or watching the clock for the next step. I am loving the flexibility it gives me! 

Oh, and me being the one who can't make something without (either accidentally or on purpose) altering at least one step, all the recipes I found had you bake in a covered cast-iron dutch oven, something I don't have, but I've been using my cast-iron skillet and it seems to work just fine. I steam the bread while it's baking so I get a nice chewy crust. It's so good, you guys. And so easy. 

I'm not afraid of rustic bread baking any more.


Saturday, July 9, 2016

Baked Beans

My sister and brother-in-law called me earlier today to invite themselves over for a couple hours this evening. They said they'll bring the steaks to grill, so... there's no turning them down. They live a couple of hours away and were going to be almost in the area anyway, so we take them as visitors whenever they happen to be around!

I decided I'm going to make a few dishes to go along with the meal. Baked beans. They just sounded good to me. I don't know if it's because it was lunch time, because I'm pregnant, or if that's just what I have on hand and it goes well with meat, but they sure sounded appetizing. The problem was I didn't feel like a had a ton of time to prepare them so I decided to skip a step and not use a recipe. It's too much work finding one I think I might like! Besides that, a quick trip to Pinterest told me that most people's bean recipes call for canned pork and beans. Can somebody tell me why? I thought pork+beans was basically pre made baked beans? I guess it doesn't make sense to me. I generally only have raw simple ingredients on hand, so my only option was to start from dry beans. 


I didn't measure the beans. I said I was just going to throw something together, so I poured in what I thought might be enough, added water, and started cooking. Meanwhile I mixed a few random ingredients that I thought might be good in baked beans. Homemade ketchup, molasses, maple syrup, dry mustard, and salt. When the beans had finished cooking I reserved the bean liquid, salted the beans, mixed in my concoction, added some chopped onion, and poured enough bean juice back in to reach the desired consistency. Of course I taste tested them to make sure I was satisfied. A couple spoonfuls later I decided it not only was good enough, but I didn't make as much as I should've. I'm sure I consumed my portion already. I had to stick them in the oven to bake pretty quick just to keep my spoon from dipping back in. I have the oven set somewhere between 325-350* and plan to bake them for 3 hours. It really helps the flavors blend when you bake them over a longer amount of time. You just need to make sure they don't dry out in the process.


Now to torture myself with the aromas floating from the kitchen for the next hour or two. 

I think the no recipe was a success, but we'll have to wait for the final taste post-baking to double check. ;) This is how I cook. It's no wonder after being married over a year my husband still told people I hardly made the same dish twice!


Monday, May 30, 2016

Stocking Up

Yeah, so apparently I'm not good at routine.
I had every intention to blog for a whole week on food budget, but days passed and I got more and more behind. I still want to share with you on my shopping trip for the week though! In one of my last posts I told you I was out of a few staples and was planning a shopping trip. Here's what I bought:


Carrots, celery, butter (enough to hold us over since it wasn't on sale), dry beans, salted sunflower seeds (a great go-to snack), napa cabbage, spaghetti sauce, tuna fish, 2 dozen eggs, and a 50lb. bag of whole wheat flour (not pictured).

Total: $62.38

Supper that day was stir-fry, using the cabbage, a few carrots, and ingredients I had on hand such as rice, steak, and I can't remember the rest. I think I used some of the sunflower seeds, too.

I still had the ham bone and some extra meat leftover from the ham I had cooked earlier in the week, so I used that to make soup using the carrots, celery, and beans I had bought. There was enough soup for a supper and leftovers for a couple of lunches. 

The rest of the miscellaneous items were for stocking up purposes and most of them are still sitting in my pantry waiting for use. I still have some carrots and celery in the fridge and they are being eaten as snacks. Carrots and all homemade ranch dip, or celery with peanut butter. Yum!


Thursday, May 12, 2016

Leftovers

Some people can't stand 'em.

In our house, leftovers can be a reason to celebrate! Have you ever ate something and exclaimed that you could eat it every day? Well, why not at least go for two? Don't get me wrong. There are some things you don't care to eat two days in a row, but in general, we are not a picky household and leftovers of a good meal are always welcome. 

Sometimes I even plan for them! Certain dishes just make sense to prepare enough for two meals. If you're spending the time and energy in the kitchen anyway, don't bother cutting the recipe in half. When we were first married, my Grandma offered some advice in caring for a home and cooking for two. I grew up with twelve siblings, so cooking for two wasn't just a cut-amounts-in-half sort of adjustment. Thankfully I transitioned fine and we never had an overabundance of leftovers in those first few months. One of the tips Grandma gave me was don't cook for just one meal. Make enough for two and either freeze the other half or refrigerate as leftovers. It saves a ton of time in the kitchen that way! But to go along with that, she recommended only serving enough for one meal. If those seated at your table have to look at a full dish of food, you'd better expect them to want to try to eat it all, even if they have already had enough to be satisfied. There's a psychological reason for it somehow. It's the same reason that caterers don't have ALL the food out when the first people get in line. They'll see there's an abundance and help themselves to a feast, only to have the last in line have to pick through what's left. Make sure you serve plenty to your family though, and don't skimp for the sake of leftovers and one less afternoon in the kitchen. 

I'll have to share the recipe sometime to one of my favorite dishes to make double. It's a macaroni skillet casserole. It's a one-pot eeeasy, quick dish that is loaded with goodness. It was love at first bite for both of us. The way the recipe works I would've had to split several pints of canned goods in half to make enough for one meal, so it was less work to do the whole thing. Another bonus of this dish is it tastes even better the second day! There are plenty of dishes that do, as an overnight stay in the refrigerator is enough to blend the flavors for a fuller taste and enhanced greeting to your palate. 

When serving leftovers, try to make them pleasing to the eye and not a boring second-day meal. Leftovers aren't always the most visually appealing and I think that could be a reason some aren't fond of them. We as a people often choose our food and eat based on appearance, though a mighty flavor can live in a plain-looking dish. If it's a meal with cheese, try adding a fresh sprinkle to the top before serving! Or add some parsley so you have a little bit of fresh green color to your plate. Be creative and think of how you would want your meal to be delivered to you.


For a recap of yesterday, I spent all afternoon hanging out with my husband at work and didn't return home until supper time, and around three minutes before my husband pulled in the drive after me. That's enough to make an unprepared wife panic. But leftovers came to the rescue! I kind of felt bad, but there was plenty of baked beans and potato salad left from the night before. Not to mention all that ham! As I reheated the beans I was trying to come up with a new way to prepare the ham or else find a new way to get some protein so it wasn't a carbon copy of the previous night's meal. Then hubby walked in, snagged a bite of his beloved potato salad, and asked what was for dinner. Instead of crumpling into a heap at his feet, he saved the day for me. He was looking forward to more ham! So our meal was exactly the same, and we enjoyed every last bite! 


Food tip #2: Save time - don't cook for just one meal.

Wednesday, May 11, 2016

Food Budget - Day 1

Time for an update on yesterday's meal! The menu did in fact go as planned, but baking time did not. Oh well. Reality. It was good, though!

Dun-dun-da-duh! (Drum roll)

The main dish was ham! The first I'd ever made, so I forgive myself for it being done an hour later than I was hoping. We had been given a 10lb ham several weeks ago and I'm rather excited about the mileage we'll be able to get from it. I can think of several ways to use the leftovers, and hubby chimed in with a few more as he helped me put away the leftovers last night. Ham is a rare thing here. (I mean, I did say it was my first time cooking one.) Pork is not our meat of choice, but both my man and I agree there is an exception for bacon, ham, and sausage. So basically anything that doesn't taste like plain pork. 

What I served with the ham? I made homemade baked beans, also a first. I pulled out my recipe book *for the first time* and compared all (five) of the bean recipes I had with each other. Most of them said to bake for 5-7 hours, but it was 3pm when I got started, so.... I used ingredients from some of those recipes, but followed the baking time a little closer for the one that said two hours. haha! The ham took an extra hour to bake, so my beans did too. It ended up being more like four hours then. A happy medium, I call it! 

A potato salad also accompanied the meal. It was a rather chilly cloudy day and I was beginning to wish the ham was done the day before so it could be soup day. Potato salad? I know I've been waiting for non-winter weather so it's season for it, but couldn't I have done baked or mashed potato? But... when my man walked in the door for supper and saw the bowl on the table from across the room, he asked if it was what he thought it was. He LOVES potato salad! It was a housewife-helpmeet win. Maybe not ideal for a cold day, but it was perfect to please the husband, and that is important when planning your menus, budget or not. In this case it was an inexpensive way to make him happy, but I recommend even spending a little extra to get him some food he really likes. Your job isn't just feeding your man, but making him happy, which is basically the same thing. 


Food tip #1: Make sure husband is happy. Even if it costs a little bit extra.


Tuesday, May 10, 2016

Food Budget - How Do I Make it Work?

This week in one of my mommy groups, the subject of food budgets came up. Everyone was sharing what they spent, how they saved, and how they made feeding their family work. That got me to thinking how I really save money in the kitchen. I know my food budget is pretty small, but how? What have I done differently to keep expenses low and still eat healthy? I know I garden and use that produce during the winter, but I don't can everything. So, I have been inspired to pay attention to what I do, not change anything from my "normal" routine, and come back here with a report. The timing is perfect because I haven't had any time to plan menus and stock up special for you blog readers. Currently I have a pretty big list of things in my pantry that are in dire need of restocking (like, these staples are gone). This way you'll be able to see that I do spend money!

It's Tuesday, so basically the start of a new week... ish. Yesterday for dinner I made fajitas, which consisted of some steak I had in the freezer, peppers that I had chopped and frozen from our garden, homemade tortillas, and sour cream that I already had in the fridge. 

I guess I should warn you first. We don't eat multiple dish meals on a daily basis. One reason for that is because it's not practical for us. I'm feeding two adults and a baby, and we don't eat a ton. It doesn't make sense for me to serve a fraction batch of rolls or open several different cans of vegetables only to have half of them sitting in my fridge waiting for me to come up with another way to use them up in the next few days. I do it on occasion when I know I'll use them, but as a general rule I try not to fill my fridge with little bits of food. I prefer leftovers to be enough for a lunch meal or else another days dinner. Now that the little guy is eating solids, it's a bit more frequent that I have partial jars in the fridge, but I try to feed him from the ingredients that we're also having for dinner.

Breakfasts and lunches are pretty random, too. I used up our last egg yesterday, and we were out of bread (I'm baking more as I type), so I made me a giant pancake for breakfast, with no egg, since we're fresh out. It's 1pm and lunch is going to be some leftover Shepherd's Pie from a couple days ago. I have supper planned, but there are times that I change my mind last minute, so I'd best wait to let you know what I've actually made after the fact. 


Come follow along on my adventure! And feel free to comment with any questions.

Friday, April 22, 2016

Homemade Butter


Milk, yogurt, cheese, and butter have been plentiful in our house lately! We rarely have enough dairy products to keep us satisfied. Somehow it always gets consumed shortly after making it through the doorway. Well, try getting a cow! Or better yet, have your brother take care of one. I can't tell you how many gallons we've gone through in the past two weeks, but we have certainly had our fill!

Allow me to introduce you to homemade butter. It's so good I could eat it plain. For real. And this stuff is so easy to make! I have made a fair amount in my day using food processors, electric butter churns, and also by hand. The method I'm going to teach you uses a simple canning jar - by far the best, most efficient method I have come across when you have less than several gallons of cream on hand.


First off, you're going to need to separate your cream if it isn't already. I skimmed mine off the top of several gallons of milk. Place the amount you want to work with in a jar and heat to 70*F. It is really important that your cream is this warm, as it will cut down your butter making time tremendously! I split my cream amounts so my jar wasn't more than half full, and ran it under hot water until reaching the desired temperature.


Next step is shaking! Mix it, shake it, swish it back and forth. You may have noticed my little man's feet sticking out from behind me. He actually fell asleep while being jolted around!


You're going to shake it until it starts to separate and get transparent looking. You'll notice yellow bits of butter forming. At this point, you may want to shake it just a little bit longer, gently, just enough to bring the little bits together some. If you have really warm cream it will look greasy, and the more you shake it the greasier it will get. I guess you'll just have to keep an eye on it. When it looks like butter, you're good. Just make sure the bits can hold together and won't wash away when you start the rinsing process.


Rinsing Method #1


Pour the buttermilk into another jar or container and save for later. It makes some mighty tasty buttermilk biscuits! I just separate the buttermilk through a crack in my lid. Less dishes to wash that way! That's definitely a goal when I'm in the kitchen. :) Dump the butter into a bowl.


Next comes the rinsing. Your goal is to get all of the buttermilk washed out, as it helps the butter last longer. Buttermilk sours before butter, and will sour the rest of your product sooner if you don't wash it out. Because this is a natural product with no preservatives, it will naturally sour sooner than grocery store butter, but by washing it we are doing our best to help it last as long as possible.

Simply pour water over the butter and squeeze it back out. You can see I am working under water while I'm rinsing it. I use cold water to try to get the butter to harden some so it's easier to work with. Your water will be really cloudy at first, so dump it down the drain and pour more fresh water in. When I rinse my butter, I use a bread-kneading motion. Squeeze, turn, press, whatever it takes to make sure the buttermilk washes away. You're going to need to keep redoing your water as you work. When you can squeeze and the water no longer turns cloudy, your rinsing is done. Dump out the water, give your butter a final press, and salt it to taste, kneading it in so it spreads throughout.


Rinsing Method #2

At the advice of my husband, this post isn't complete without including another method of rinsing. Though I've made a some butter in my days (which ended up on store shelves across the lower half of Michigan), Aaron is the butter master. He has far outdone me in its production! Using an old-fashioned hand butter churn, he and his brothers have made hundreds of pounds of this stuff. They perfected the art. (He's the one who taught me the butter needed to be at 70* for ideal churn time, years before we were even interested in each other.) This is the method he used with the churn, only I'm going to teach you using my handy canning jar.


When your butter has started clumping together, pour the buttermilk into a container to save for later use. Instead of dumping the butter into a bowl, you're going to do all the rinsing in your jar. Pour cold water into the jar and give it a few good shakes. The water should be really cloudy. Dump the milky water out (you're done with it), and add more cold water to the jar of butter. Repeat this process until the water stays clear even after shaking. When all the buttermilk has been rinsed out, pour the water off and transfer the butter to a bowl. Squeeze all the remaining water out. Remember you want it as dry as possible so it keeps longer. Salt to taste, kneading and working it in so it's salted evenly. If you're like me, you'll sample it to make sure!


After rinsing:


Mold into desired shape, and you're all set! 
With about a quart of cream I ended up with 8.3 oz. (1/2 pound) of butter. 


Next step is testing it out on some nice fresh homemade bread! If you don't chow it down as soon as you've slathered it on, it's really good with home canned strawberry jam, too!